
Click here to go to the PocketGPSWorld Speed Camera Database

Applies to following models:
TomTom GO 1000, 1005, VIA, Start 20, 25, 2000 series and variants (NAV3).
You must be a subscribed member of the PocketGPSWorld site, please see here for information on subscribing.
This guide assumes basic knowledge of computer usage and familiarity with the downloading and saving of files. It is beyond the scope of this guide to explain these concepts in detail.
The newest generation of TomTom devices (known as NAV3 devices) use a new method to connect to TomTom which no longer provides for direct access to the contents of the device via your computer's file manager as was possible in previous generation models.
Instead, all NAV3 devices use the web-based "MyDrive Connect" application for POI installation. There is no other method available.
Some users, particularly those who use Internet Explorer, are only able to upload one file at a time. This is a big problem when the full Speed Zoned database can contain 130+ files! Thankfully TomTom have added a new method to upload a single zip file to install the complete database to the device.
POI Installation (including Speed Camera Databases)
1. Ensure you have downloaded the latest Speed Camera Database update .zip file from our download page here.
2. Choose 'TomTom (myTomTom Zip)' as the SatNav System type. You can choose to include our 'pMobiles' data' at this stage. pMobiles are camera locations that have been reported to us but remain unconfirmed. Some users like to have this data, others prefer to rely on our verified data only. Then choose 'UK - Speed Zoned Complete' (for other countries and database types, make your selection as appropriate). If this is the first time you have installed our database to your device you will also need to choose a voice pack at this stage. You can choose from male and female voice alerts both with and without chimes prefixed.
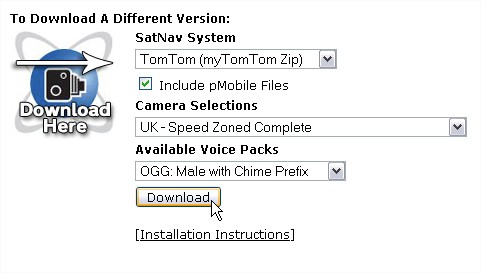
3. Click 'Download' to begin the download process. A compressed .zip file will be saved to your computer. Make a note of the folder where you saved the file.
4. Connect your device to your computer, right-click the "MyDrive Connect" applet which is located either in the system tray (Windows) or the Menu Bar (Mac OS X).
5. Note the menu item "Manage Community content" in MyDrive Connect. If you do not see this menu entry with a device connected (it is not visible when no device is plugged in), then you do not have the latest software installed on your device or the latest version of MyDrive Connect. You can download the latest MyDrive Connect release here.
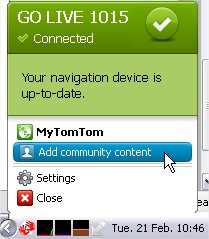
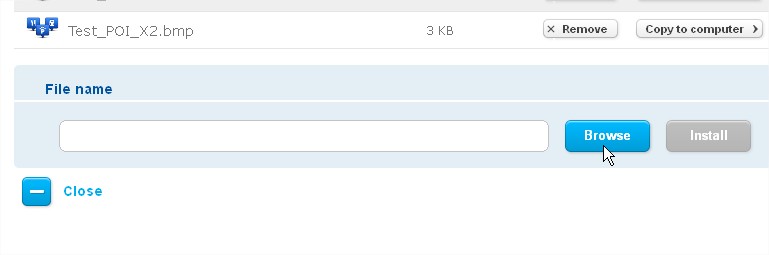
6. Click "Manage Community Content" and you will see the following web-page appear:
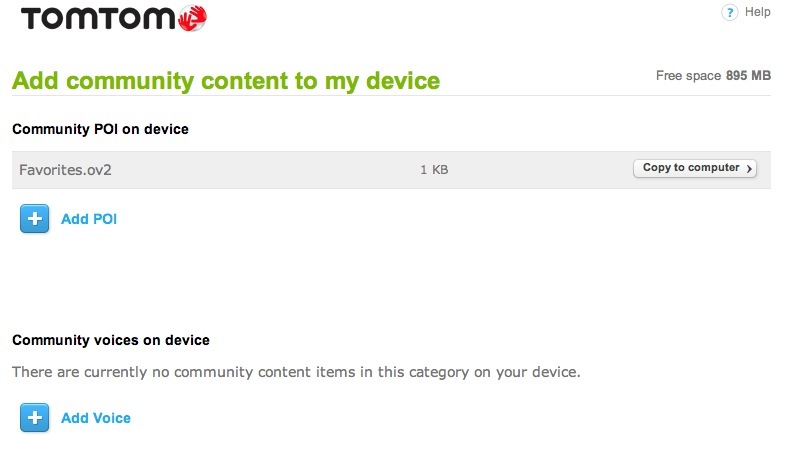
7. If you have not added any POI data previously you will only have one file listed as installed on your device, "Favorites.ov2' as seen in the image above.
8. The new functionality allows you to browse your PC for the speed camera zip file that you saved in Step 3.
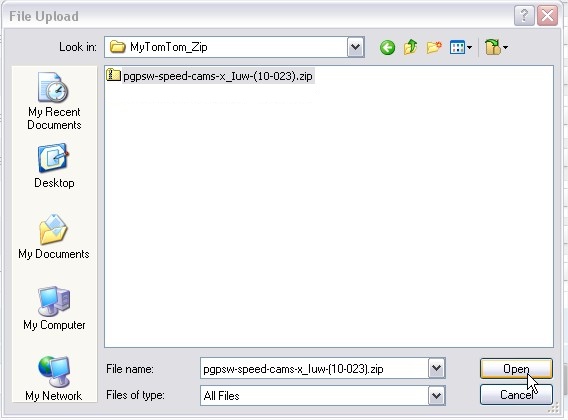
9. Click 'Add POI' and then Click 'Browse'.
10. Navigate to the folder in which you saved the files downloaded in Step 3 above.
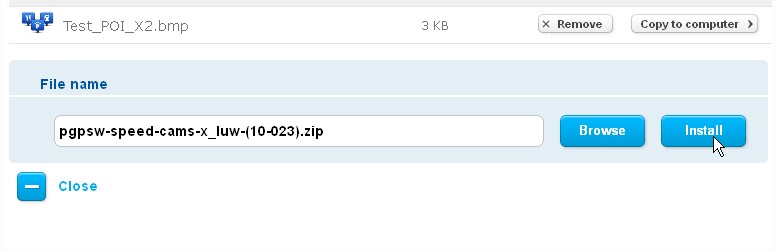
11. Now the file name should have appeared in the selection box in MyDrive Connect, so click on "Install". (Note that using this method you DON'T get any warning that you are about to overwrite the older files).
12. That's it! All in one step! Once the files have uploaded, you should be able to see them all on the MyDrive Connect screen.
13. Now (if this is your first time) you can go see the "Configuring Warnings" section below.
If this is a weekly update, there's no need to repeat that process.
Configuring Notes about Icons Shown (or not shown) in MyDrive Connect
(If you're all happy, don't bother with this bit!)
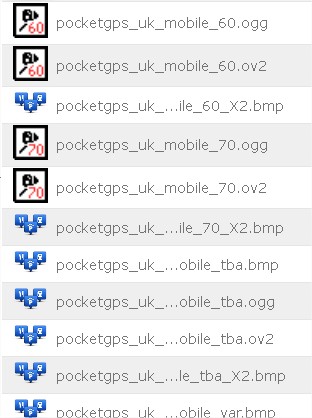
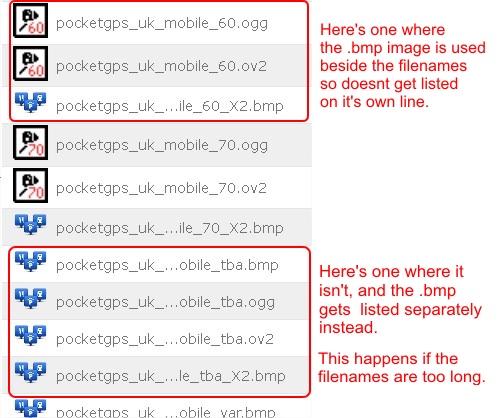
Don't be alarmed that the list of files shown by MyDrive Connectmay not seem complete.
TT have done their usual trick of trying to make things simpler, and ended up making them more complicated!
Normally, if you add a set of 4 POI files (comprising the .ov2 data file, the .bmp icon, the X2.bmp optional double-sized icon, and the .ogg warning sound) it DOESN'T show the .bmp in the list, it just uses the file to show the correct image next to the other files. (but they forgot about the X2 one!). But if the filename is longer than 22 characters, it falls over and DOES show the .bmp separately. So here's an example of both situations...
Configuring Warnings
You have two options here, you can use our real voice alert files or you can use the built-in Text To Speech (TTS) voice engine and type in your own spoken warning. The simplest (and preferred) option is to use our real-voice alerts.
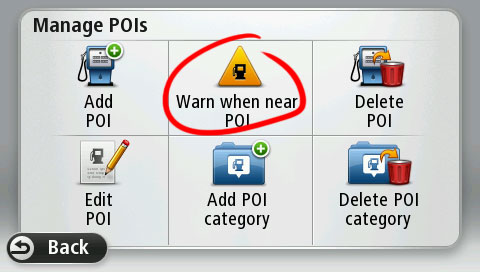
1. Now, on your TomTom NAV3 device, tap the screen then access Settings / Manage POIs / Warn when near POI:


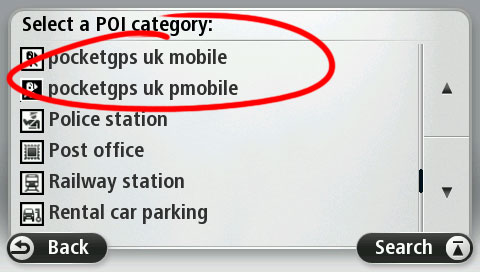
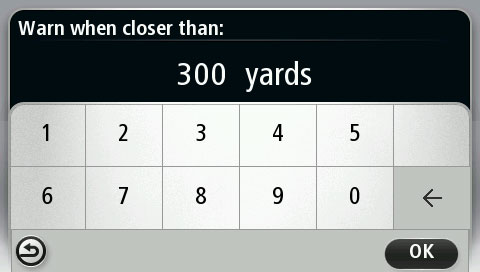
2. In the list of pre-installed POIs you will now see the PocketGPSWorld speed camera files that were installed earlier (you may need to scroll down). Then for each speed camera file, select it and configure your preference of distance and audio alert type. As a guide we recommend you use the suggested settings in this table. Choose your preferred warning time and then read off the recommended distance for each speed:
|
10 seconds |
15 seconds |
20 seconds |
25 seconds |
30 seconds |
20 MPH |
98 yards |
147 yards |
196 yards |
244 yards |
294 yards |
30 MPH |
147 yards |
220 yards |
293 yards |
367 yards |
440 yards |
40 MPH |
195 yards |
293 yards |
391 yards |
489 yards |
586 yards |
50 MPH |
244 yards |
367 yards |
489 yards |
611 yards |
783 yards |
60 MPH |
293/strong> yards |
440 yards |
586 yards |
733 yards |
880 yards |
70 MPH |
342 yards |
513 yards |
684 yards |
855 yards |
1027 yards |
For Mobile locations we recommend the following distances are used:
|
Distance |
20 MPH |
400 yards |
30 MPH |
600 yards |
40 MPH |
800 yards |
50 MPH |
1000 yards |
60 MPH |
70 MPH |
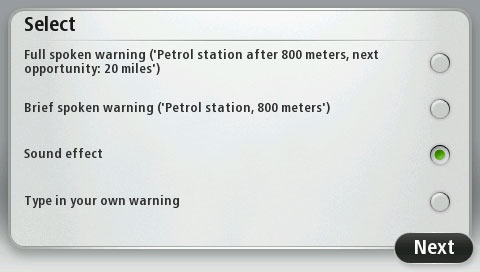
3. There are a number of options available to you. To use the voice alerts that we provide, ensure the 'Sound effect' option is enabled. To use your own spoken warnings, choose the full of brief spoken warnings option and type in the alert you wish to have spoken.
4. Repeat this for each POI. Although this is an onerous process, subsequent updates will not require you to repeat it. You need only download the updated database and overwrite the .ov2 data files as explained earlier.
IMPORTANT: PLEASE BOOKMARK THIS PAGE NOW FOR FUTURE REFERENCE
Add this page to your list of favourites/bookmarks. Please right click here.
NEED HELP? - > |
Please note that the safety camera warning software is a free add-on to membership and as such is not a commercially guaranteed product. Both the camera database and the site offer community support and help only. That said, the answers to the vast majority of questions are provided within 24 hours.
- For account/subscription/password related issues, please use our Support System and log a support request. See here.
- For installation and other issues please use the forums.
|
|


