Hi! We see you’re using an ad-blocker. We’re fine with that and won’t stop you visiting the site.
But as we’re losing ad-revenue from this then why not make a donation towards website running costs?. Or you could disable your ad-blocker for this site. We think you’ll find our adverts are not overbearing!
GPS gets everywhere. The rise of the smartphone has helped in this with the myriad of location-based apps that are available. Whether hunting down your local McDonalds, locating your friends, getting speed camera warnings, viewing Wikipedia facts as augmented reality over your view of a cathedral or simply taking a photo on a smartphone, GPS sticks its oar in.
I would hazard a guess that most people here won't have batted an eyelid at that last reference but a surprising number of people that I speak to don't actually realise that practically all smartphones store the GPS location in the photo itself - whether they're iOS, Android or Windows Phone 7/8. This process is known as geo-tagging; the geographic location is inserted into the photo's meta data along with various other things like the camera model, and the focal length etc.
While smartphones are probably the most used cameras for day to day snaps and the improvements over the years have been rapid, they're still not a replacement for a dedicated camera. Even with a great quality lens such as the Carl Zeiss used in the Nokia Lumia 920 a quick photo opportunity can be ruined by your mum phoning to see if you can pick up some cat food on the way home. Battery life is also an issue - just look at the massive range of portable chargers that are available in any high street electronics store.
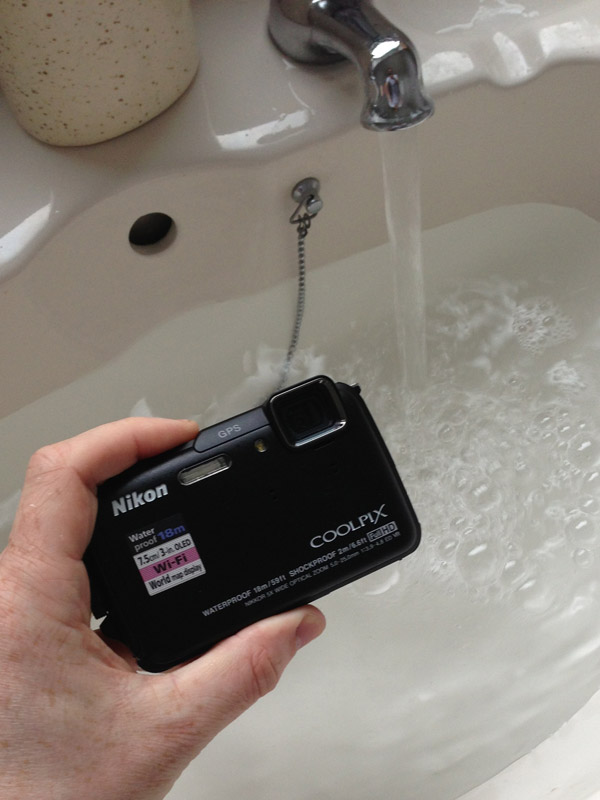
That rather verbose introduction brings me nicely to my purpose here today; my review of the Nikon COOLPIX AW110 - a GPS-enabled, fully waterproof (yes, I tested it), shock-proof, 16MP point-and-shoot camera.
The review will focus primarily on the geo-tagging and GPS-logging aspect of the AW110 but will also touch on the overall quality and experience of the camera.
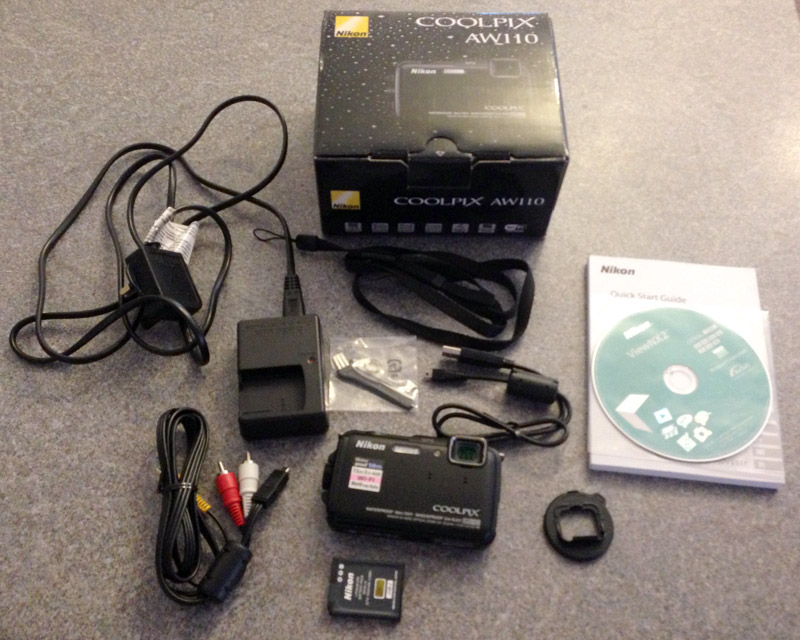
In The Box
What's in the box?
Camera
AV lead (RCA/phono)
Neck strap
Rechargeable battery
Mains charger
Filter adaptor
USB lead
Software CD
Instruction manual
In Use
In general the AW110 is relatively straightforward to use, all the standard features of a point-and-shoot camera were easy to access. This included the wide range of 'scene' modes where the settings are adjusted to preset values for a range of different photos; scenes such as night-time landscapes, sports, portraits and fireworks. The camera has an auto-scene mode whereby it takes a fairly accurate guess at the type of photo you're taking. I was a little disappointed that no wrist-strap was included with the camera as I've never really been keen on neck-straps. However, they are readily available so it's not really an issue.
Front and rear of the Nikon COOLPIX AW110
The first thing that impressed me was the speed it turned on - from pressing the power button it was ready to take photos in less than a second. The quality of pictures is impressive with good, realistic colours both indoors and out. The full HD (1080p) video was very good quality too. Some of the advanced features require you to turn off the auto mode but the physical buttons and the menu system are easy to follow. Pressing 'SCENE' lets you choose a number of different settings depending on the type of shot you're taking. You can also manually adjust these settings although I found the scene options worked well and would probably be fine for the general user. I was suitably impressed with the macro function for close-up shots and you can see my effort in the sample photos below.
One thing I like about taking photos on a smartphone is that they will auto-rotate depending on which way round you hold your phone - so if you take a landscape photo and then view it with your phone in portrait then it will rotate the image so you don't need to rotate the phone or turn your head sideways. The Nikon AW110 also does this, which I feel is a very nice touch. The camera uses a 3inch OLED display, which is very sharp and easy to see even in bright sunlight.
Most people are familiar with editing photos on the computer afterwards, such as changing them to sepia tones, highlighting only certain parts in colour etc. With the AW110, Nikon have added a number of effects to add to photos either at the point of taking them or to edit them afterwards. These include highlighting certain colours and tones, adding fisheye effect, making it look like a painting and the 'toy camera effect' - which I dubbed 'The Instagrammer'. While nothing ground breaking they do add a bit of fun to your images, and the results from the colour highlights can be quite pleasing to the eye.
The camera will also create panoramas and 3D photos although I don't have any way to view how effective the 3D photos are. The 3D photos are saved as .MPO files which is one of the standard formats for stereo imaging. The AW110 can record video in full HD resolution and it also has a high speed recording mode where events can be recorded at up to 8x the normal speed so appear slow when played back.
Gallery of Photos Taken With the Nikon COOLPIX AW110 Right click and 'open in new window' to view the unedited, full-size original NB: larger images are approx 3MB so may take some time to load in full!
GPS-Related Features
So, now we get onto the fun stuff - and by 'fun' I mean the GPS-related features. The AW110, as well as having GPS built in, has a digital compass and NAVTEQ maps and POIs. Once you turn on the GPS in the main menu you get an icon showing the GPS signal strength on the screen - it acquires a fix quite quickly and is sensitive enough to manage an occasional fix indoors. A small compass on the screen also shows the direction you are facing. You can choose to show local POIs on the bottom of the screen which allows you to see what will be tagged in your photos meta data. A common complaint for many satnavs is the accuracy of the inbuilt POIs - whether NAVTEQ or TomTom mapping - or, rather, the inaccuracy. Needless to say, the AW110 is similarly affected.
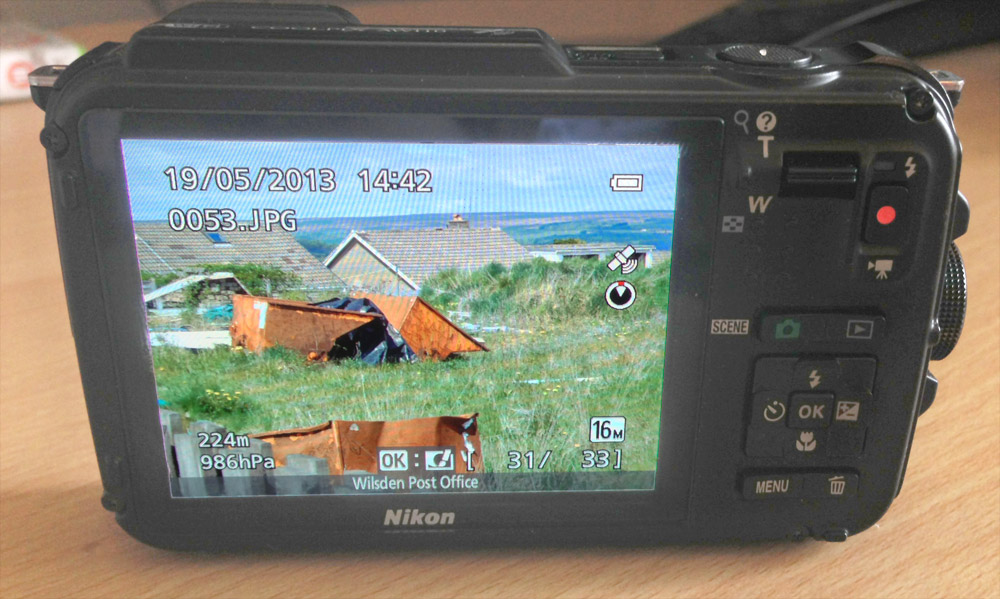
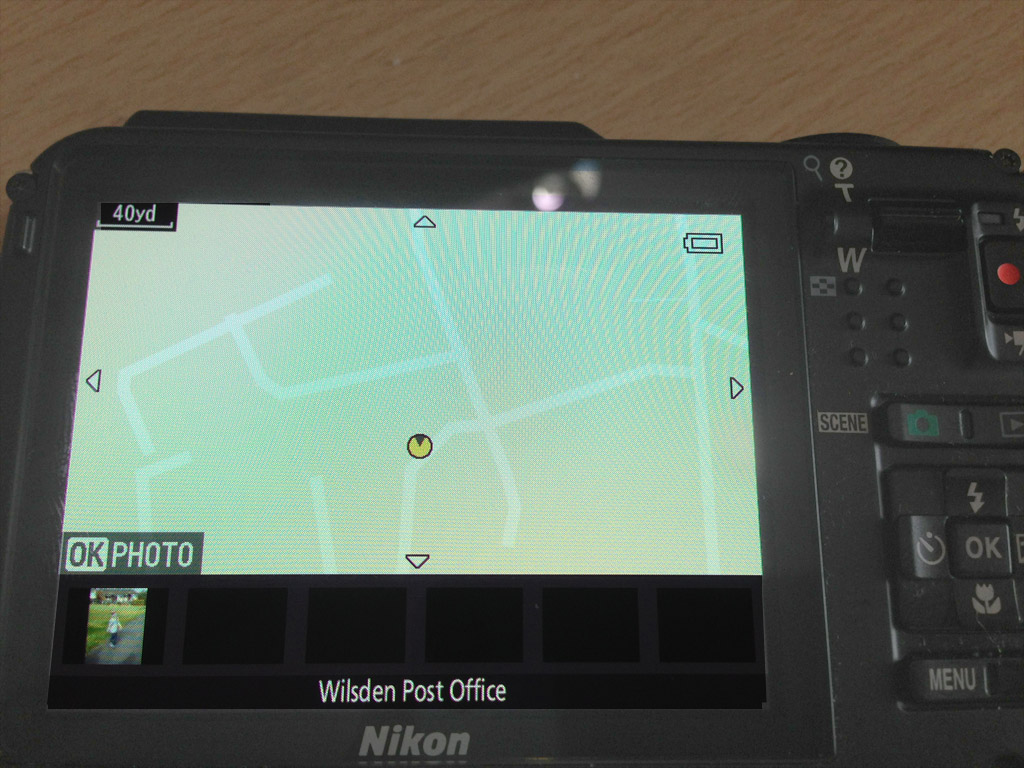
POI display on the viewing screen
Once a photo is taken the coordinates are saved to the photo and the POI name and address is also saved. You can choose what level of detail to save in the photos data e.g. country, town, street, POI. However, the only downside to this is it is only based on the built-in POIs and you can't add your own data either on the camera or via the supplied software. You are able to choose from the nearby POIs, but you can't add your own descriptive text. So in my village where NAVTEQ POIs are slim to none every photo is logged as being at Wilsden Post Office! Obviously the important part is storing the actual coordinates but a bit of customisation, even if it had to be done on the desktop software, would be a nice addition.
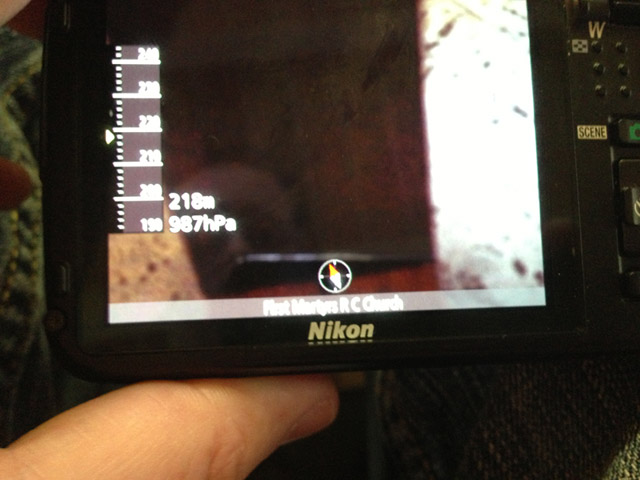
We attended a christening and I was pleasantly surprised that even in the church the camera acquired a GPS fix and, more surprisingly, that the POI was shown correctly as "First Martyrs R C Church". However, the afternoon do at Salem Rugby Club, which has been going for nearly 100 years, was tagged as "Heaton Baptist Church". I edited the POI level on the camera itself and the next level was simply "Bradford". So, overall, the POIs can be useful if NAVTEQ have the data but, in general, it is lacking. You can, if you wish, choose not to embed the POI data into the photos data. The main thing is the actual coordinates do seem very accurate when you view them on a map later.
You can also view the locations on the camera itself. When looking through your photos a small pin icon is shown on any geotagged photos. Pressing the map button on the side of the camera then pulls up the NAVTEQ maps on the screen and shows the location, and heading, of the photos. You can zoom in and out of the map using the zoom buttons and also move around the map using the four-way control button. This is handy for a quick look while out and about but because you are looking at road maps it means footpaths and fields are not shown. So if the photo you are viewing was, for example, taken while walking in the hills with no roads nearby you would have to zoom quite far out to work out where the photo was taken on a map. The best experience for viewing the geolocation data is within the Google maps in the bundled desktop software, ViewNX 2, which I'll talk about later.
Map display on the camera
The AW110 has a trip-logger option with recordings being taken at various pre-set intervals (15s, 30s, 1m, 3m, 5m, 10m). You can set a time limit for the log from 6, 12, 24 or 72 hours but you can also manually end any log recording. Even when the camera is turned off it will continue recording at the set interval so there's no need to keep the camera and screen turned on. As well as location you can also log the altitude (the AW110 has a built in barometer) or depth underwater. Once you've recorded your log you can view the height/depth on the camera itself in a line chart but the best way is via the ViewNX 2 software as well.
Computer Software
Most cameras will include some form of software for managing your photos and the AW110 comes with Nikon's ViewNX 2, which caters for both Windows and Mac users. The software itself can seem a little 'busy' at first glance but it is actually quite easy to use. You browse your computers folders on the left and you see thumbnails of the photos on the right. Once you have selected an image you can then use the icons along the top to carry out various functions like view the geotagged information, edit photos and videos or print and email.
File browser in the ViewNX 2 software
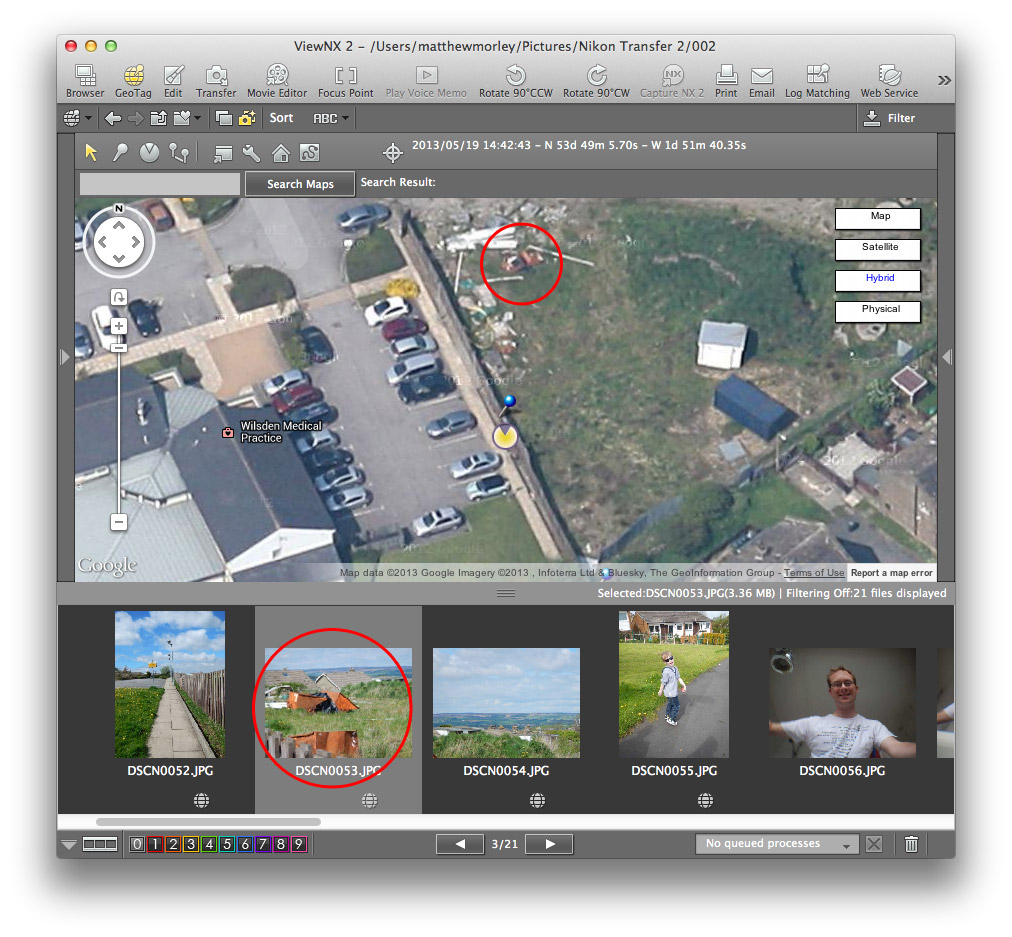
Editing allows you to adjust various aspects such as the colours, sharpness, brightness and hue etc. Selecting 'GeoTag' will then pull up the Google map and show the locations of the photos as well as an icon for the heading. Clicking on a pin on the map highlights the photo in the thumbnail viewer along the bottom and also allows you to view some basic meta data.
Map display on the camera
The accuracy of the GPS fix and the heading is very good. You can see from the screen shot below that the location and direction I was facing when taking the photo of the rusting metal containers matches the view point on the photo.
The stored co-ordinates and heading are accurate
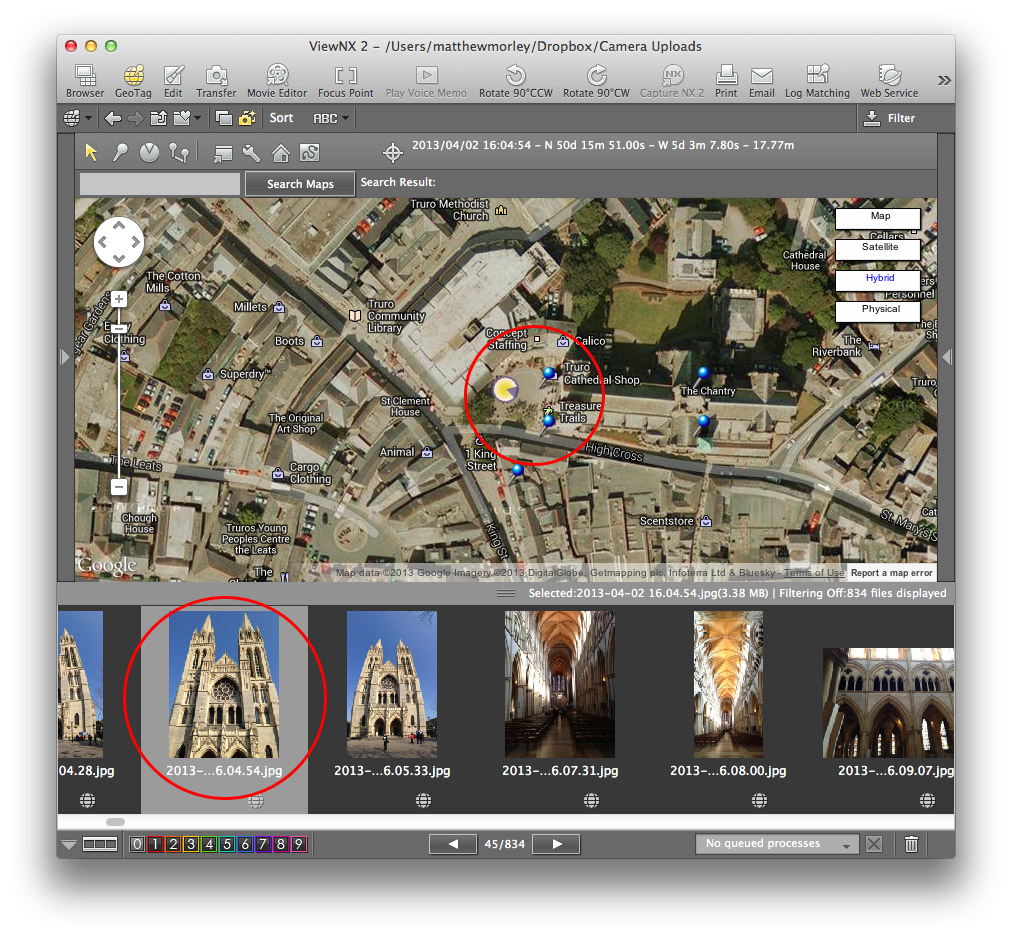
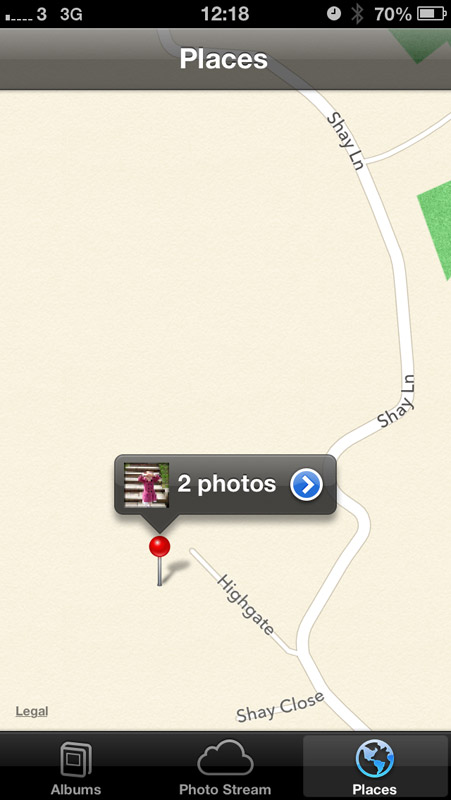
ViewNX 2 isn't solely for photos taken with Nikon cameras, you can use it as a general photo management tool and, because the geotagging is a standard part of the EXIF data in photos, it will show you maps of any photos such as those from your smartphone. Here you can see Truro Cathedral as taken on my iPhone - you can see my location (in the square in front of the entrance) as well as my heading (facing the front of the building). It's quite fascinating using it as a tool to not only remember where you were but also as a reminder of which way you were looking.
Using ViewNX 2 for geo-tagged iPhone photos
Another location-related feature of the software is for geotagging untagged photos by matching them to track logs. The idea is that you import a track log from any source and, so long as the times on your camera are correct, it will add the location to your photos by matching the location in the log with the time your photo was taken. You can also manually add or edit location details to photos.
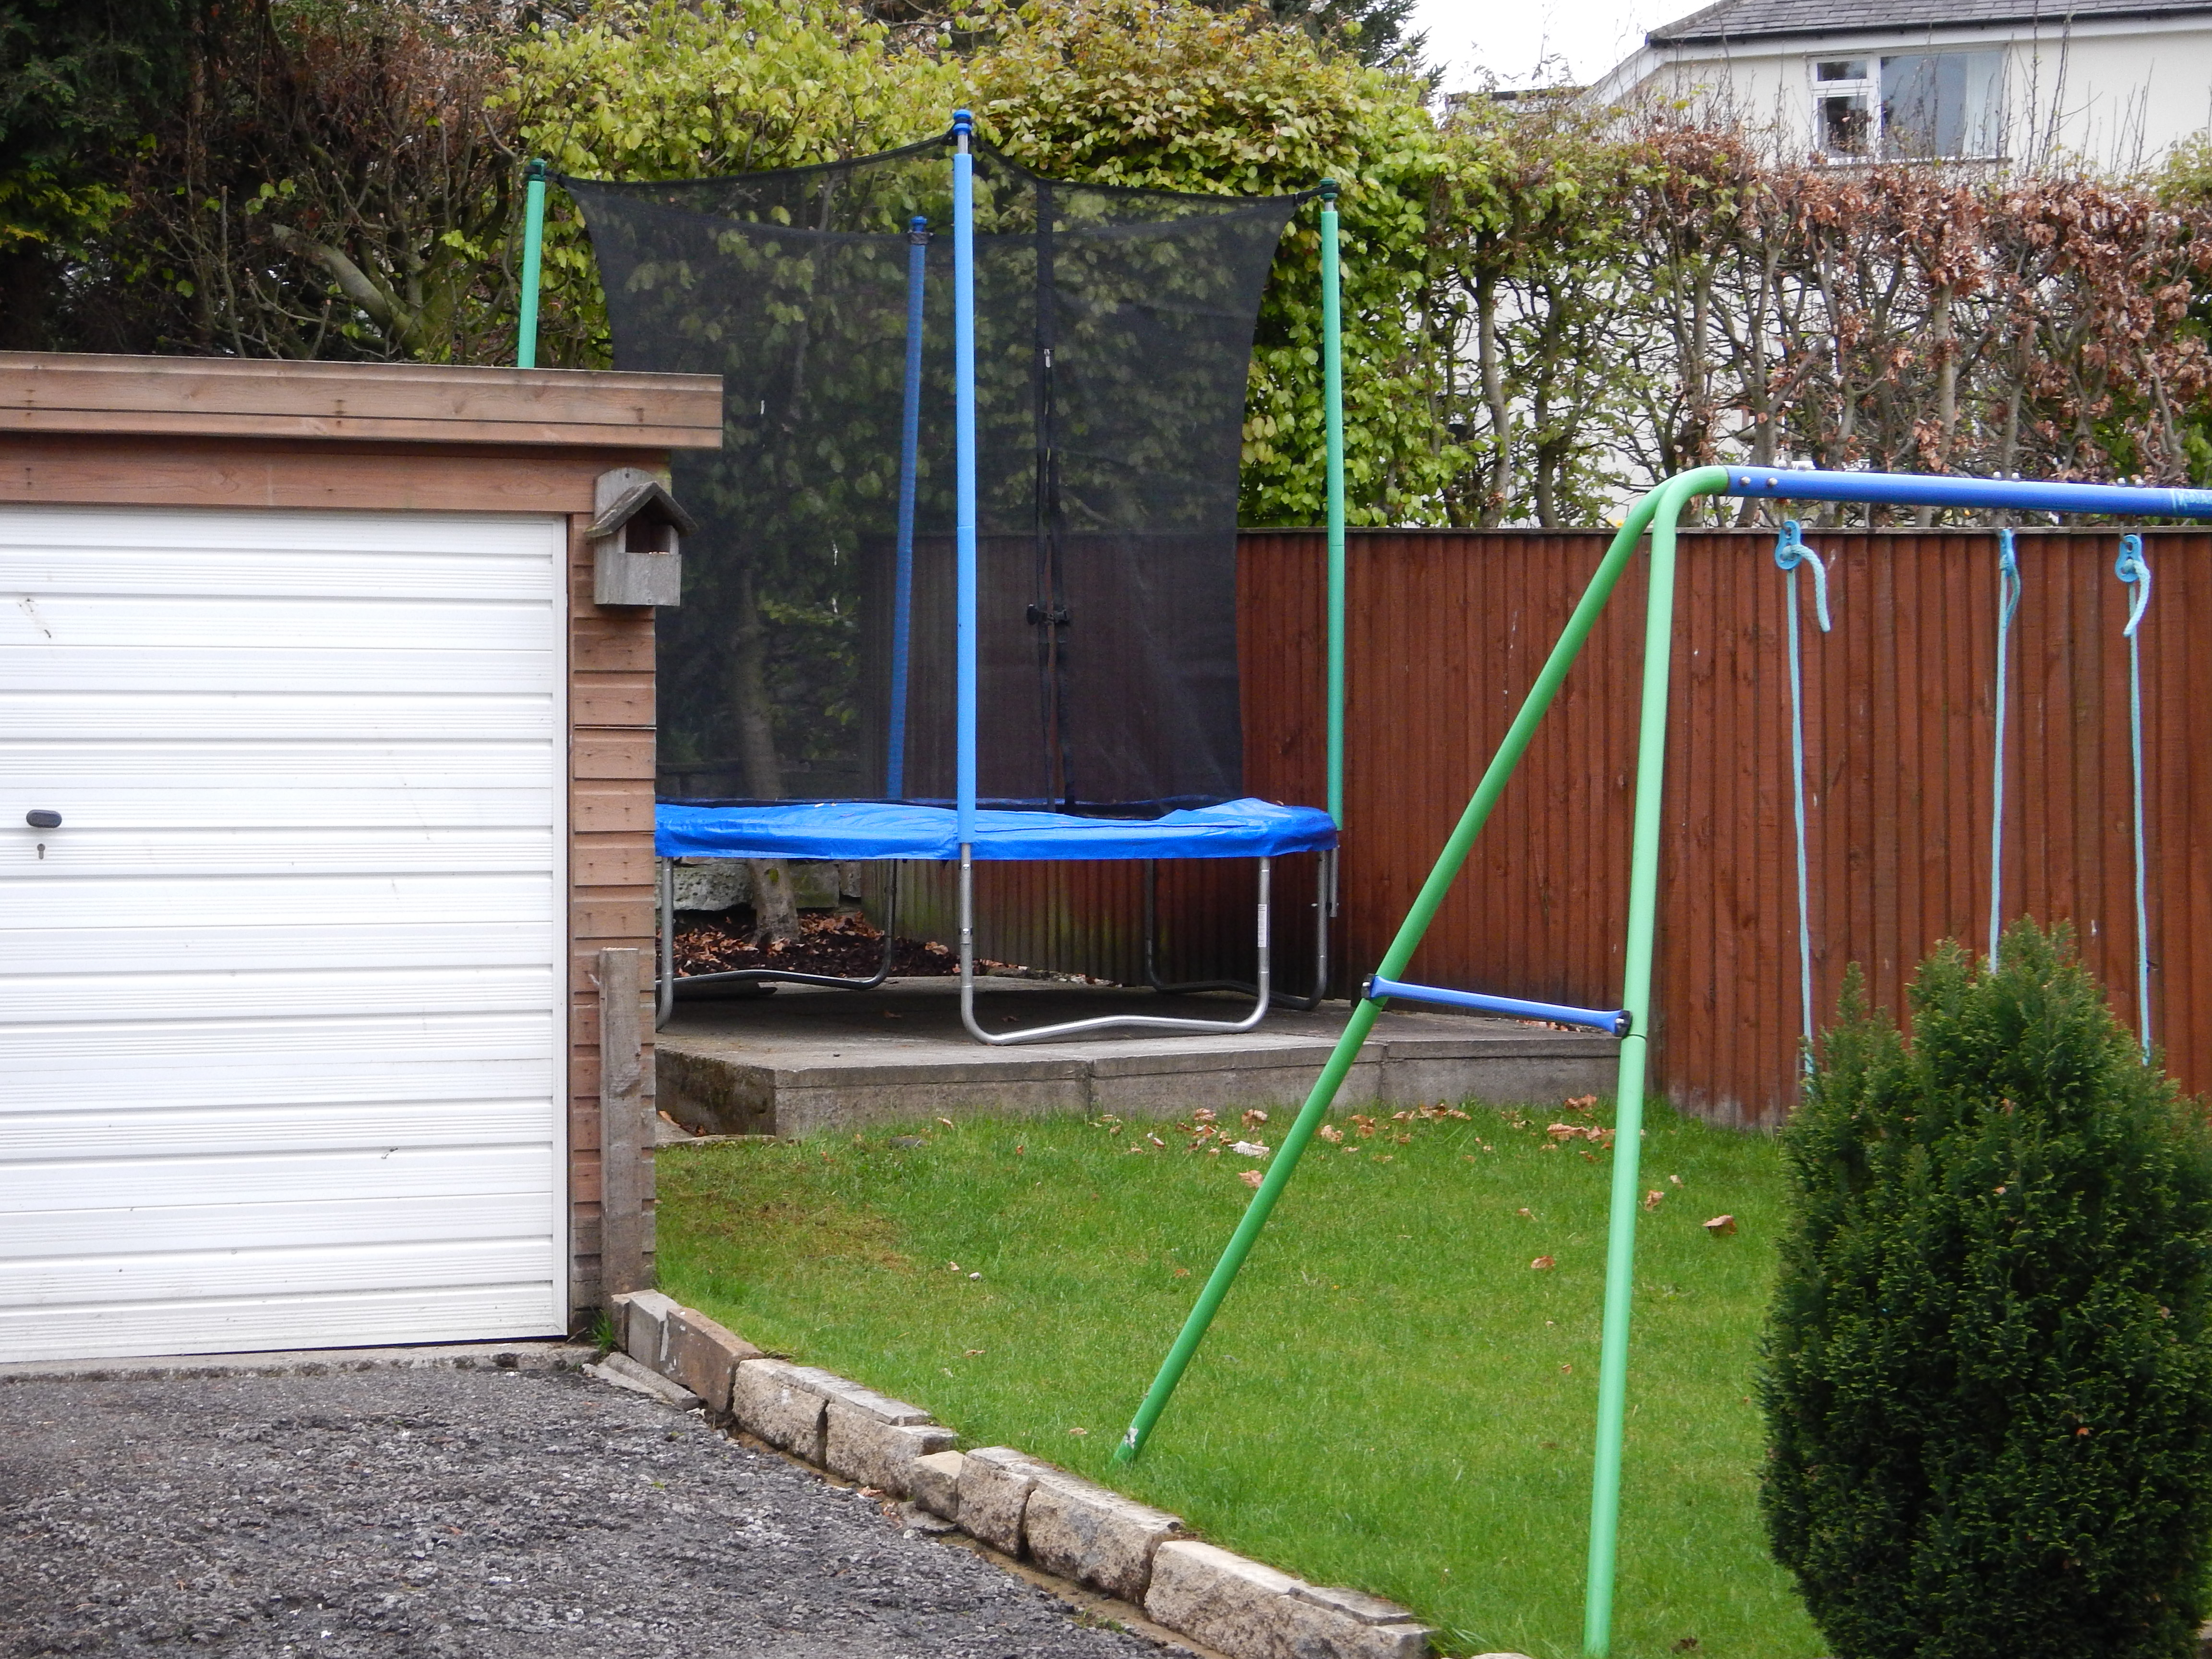
You can also view logs on the map in the software. The view below shows a log that was recorded on the camera while walking to the village fair. The green and red markers show the start and end points and the blue pins are the locations of photos.
Using the AW110 for GPS logging
All Weather
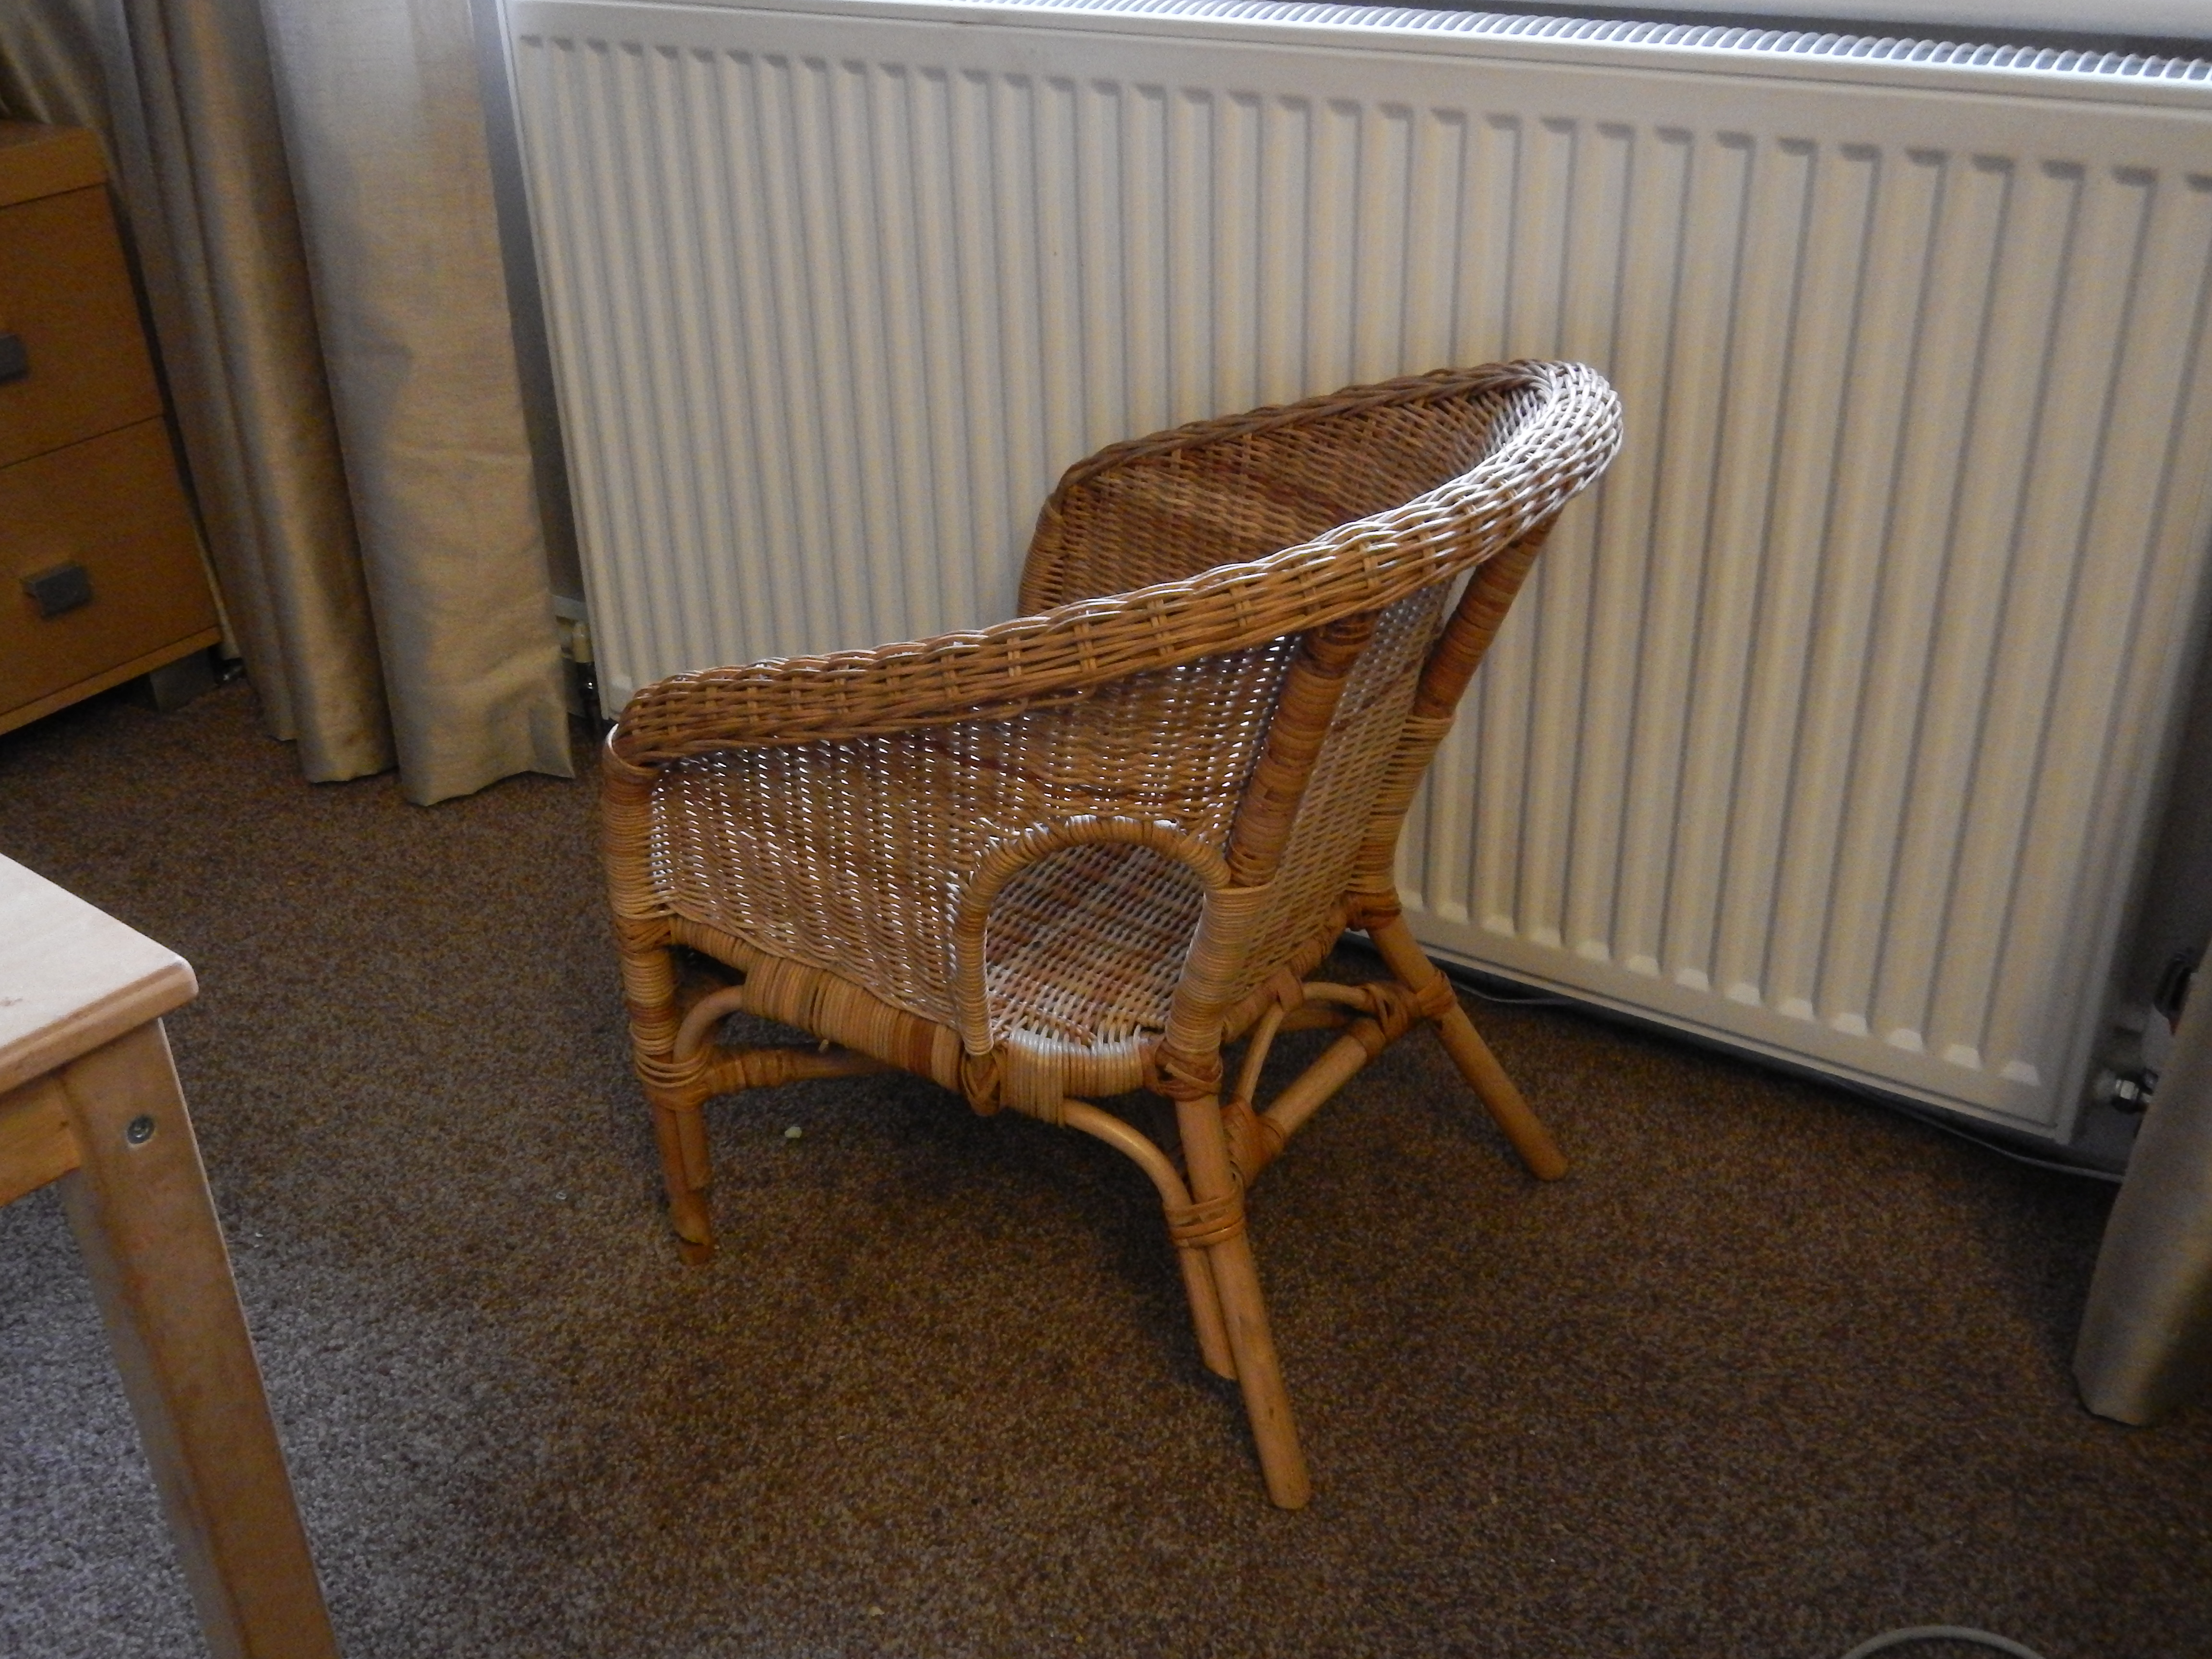
I mentioned earlier about logging depth underwater; the 'AW' in 'AW110' stands for 'All Weather', which is actually a rather large understatement. It is, in fact, shockproof (2m drop height), waterproof (IPX8 - up to 18m underwater for up to 60 minutes), dustproof (IP6X - total protection against dust ingress) and can withstand temperatures down to -10oC (14oF). There is, however, a downside to this 'ruggedness' - the AW110 only has a 5x optical zoom. Presumably, anything higher would need to protrude from the body of the camera and affect the overall water-tightness and risk damaging it if it was dropped. Almost as an apology for this, the AW110 includes a 4x digital zoom too.
Some of you may remember the last 'waterproof' item I put in the kitchen sink and how it turned out that it wasn't actually waterproof (if you don't then it can be found here: Magellan eXplorist GC Review). This time, however, I am pleased to say that it lived up to its claim. The battery, SD card slot and USB/AV connections are all hidden away behind a sealed door with a mechanical latch - this works very well and there was no leaking of water. I would feel very comfortable to use this camera outdoors even in a severe downpour or even stood in the sea taking some holiday snaps of the kids.
Smartphone Link
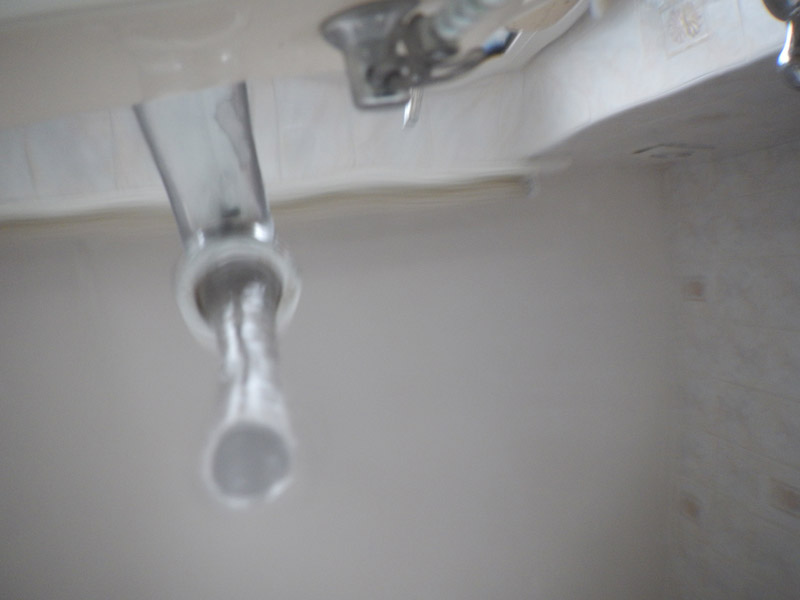
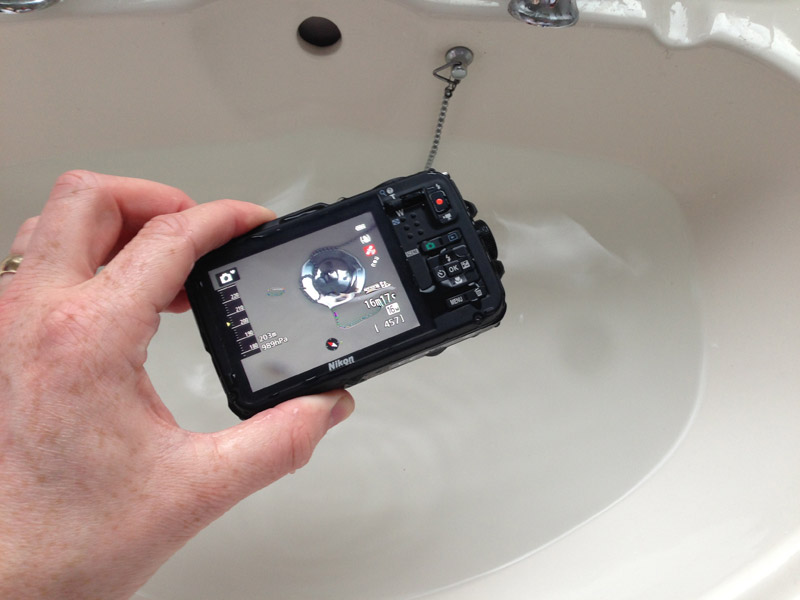
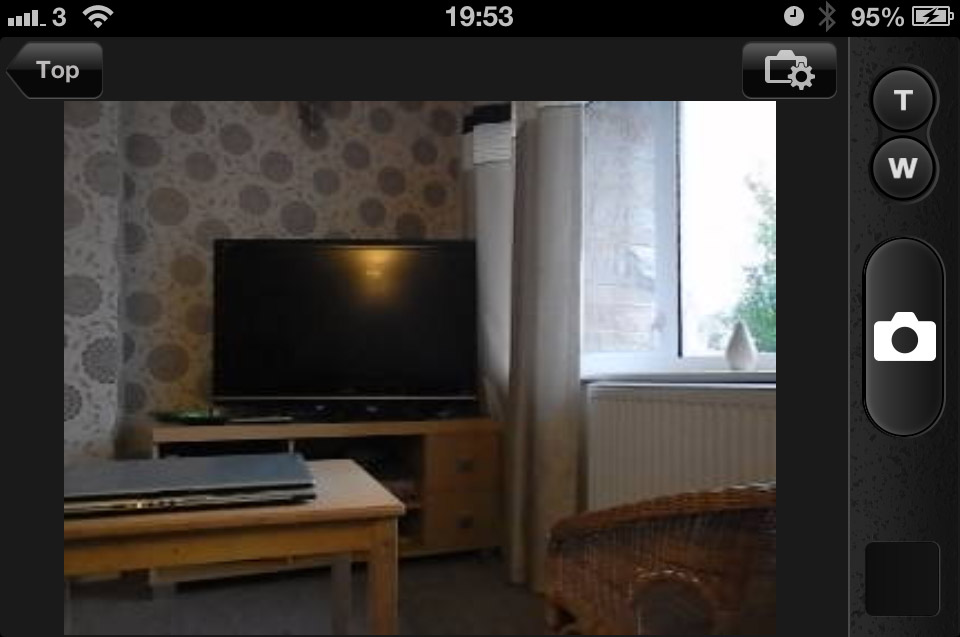
One final feature I want to discuss is the WiFi / Smartphone link. When I saw that the camera had WiFi built in my initial thought was that it could be used to connect to your home network and copy files from the camera direct to your computer over the network, or maybe even upload photos and videos to various social network sites. Sadly, this is not the case and I think a lot of people will be misled when they see 'WiFi'. What the WiFi on the AW110 does is act as a hotspot so you can connect your smartphone to the camera using the Wireless Mobile Utility app (available for iOS and Android). You can then use the smartphone as a remote control for taking photos and even see the current view from the camera - ideal for taking your own family portraits and still seeing the view from the camera (or for messing about taking a plug's-eye-view shot from in the sink...).
Once you have taken a photo it can be transferred straight to your smartphone (including any geotagged information) and from there you can share it online however you wish. While this feature does work quite well, it's not the most practical. Turning on the camera's WiFi takes a few button presses and then on your smartphone you have to disconnect from your normal WiFi (if connected) and connect to the camera. Once connected, you can launch the app and start taking your photos. It feels quite convoluted, to the point where you start to wonder if you can actually be bothered going through the motions each time. However, having the photos from your camera essentially synced with your smartphone is useful - even if it is quite cumbersome to get them.
Conclusion
Overall Nikon have created a very capable camera. The photo quality is very good and it is easy to use requiring only a minimal look at the manual - and even then that was more for confirming what a feature did rather than how to use it. The GPS tagging works brilliantly and is very accurate and the added bonus of recording track logs is a useful feature too. The bundled software is equally capable and is well thought out, although at times the display can sometimes feel a bit cluttered. The AW110 feels like a solid camera, it is well built and I'd have no worries taking it up a mountain on a rainy hike or splashing about on the beach in the sun. My only real complaint is that Nikon, in my opinion, have missed a trick by not designing the AW110 to connect to your home network for quick sharing of photos and videos. However, it does photos, videos and GPS-logging brilliantly, so I might just forgive them.
Posted by tonythebrainsurgeon on Thu Aug 15, 2013 6:12 pm
Hello. I found your review about the Nikon Coolpix AW110 GPS feature (Nikon COOLPIX AW110 GPS-Enabled Digital Camera, June 13th, 2013) very complete and helpful. I have one problem. I have the camera Nikon Coolpix AW110 and when using the POI feature I get all the right information in the camera screen. Both in the shooting and the playback screens. I got the time, date, latitude and longitude as well as the POI (name of the place) in a very accurate way.The problem is that the POI information is not transferred onto the picture. The rest of the information is perfectly transferred into the picture but not the POI. There's a setting "DATA IMPRINT" that transfers all the information to the picture but not the POI. I got the POI settings POI EMBED and POI DISPLAY set to "ON" and it displays the POI but not emded it onto the picture. When the pictures are imported to the laptop using the NX2 software, all the information except the POI is embeded in the picture.
Can you help me with this?
I contacted the Nikon support in USA and they didn't know.
Thanks a lot.
Dr. Fernandez (Tony)
Posted by MaFt on Thu Aug 15, 2013 6:25 pm
Not sure. I never imprinted the poi data into the picture itself. However the mac version of the software did transfer it over and store it in the EXIF data of the file.
Do you mean you want the poi name actually printing onto the photo? If so then I would assume this needs to be added to the cameras software/firmware in an update from Nikon themselves.
Sorry I can't help you any more than that!
Posted by tonythebrainsurgeon on Thu Aug 15, 2013 7:30 pm
Hello,
I want to add to my previous e-mail in reference to my query that the people from Nikon told me that the information about the POI cannot be imprinted onto the picture. It will be a little unusual to have an information on the picture that is not so easy to understand. When you look at a picture sometime after it was taken the latitude and longitude information is not as clear as Paris, New York, Hyde Park, London, etc. Also if it was not intended to be imprinted onto the picture why having the “EMBED” option together with the “DISPLAY” and not just the “DISPLAY”. It’s really strange that all the information is embedded except for the POI.
Thanks
Tony
Posted by tonythebrainsurgeon on Thu Aug 15, 2013 7:32 pm
My question again is:
The information consists on five lines, then why imprinted the first four and leave the final out?
I have a PC.
My doubt is why exclude something that’s already there. It’s not a case of a software adding information.
Do you think that the camera software was intentionally designed to exclude the POI from imprinting?
Why the EMBED On not for the GPS but specifically for the POI?
Sorry for being impertinent but your article was excellent and you’re very smart and knowledgeable. You’re a prestigious professional in the field and maybe NIKON will give you an explanation that low-level technical support people couldn’t give me.
Thanks again
Posted by bigHondo on Mon Mar 03, 2014 6:56 pm
Very good review of the product. I did something similar when I got mine running to learn all the features and functionality. One thing that I noticed is that the GPS log stops logging when the video capture is active. I was wanting to overlay the log information and video in a rendering tool and since they stop the log you cannot do it. If you have seen anything different let me know as this is causing me to generate seperate GPS information with another device in order to get the complete video with a maps integrated together.
Posted by MaFt on Mon Mar 03, 2014 10:59 pm
I only had it for a few weeks and had to send it back. So it's not something I can test I'm afraid!
Hi! We see you’re using an ad-blocker. We’re fine with that and won’t stop you visiting the site.
But as we’re losing ad-revenue from this then why not make a donation towards website running costs?. Or you could disable your ad-blocker for this site. We think you’ll find our adverts are not overbearing!