|
Article by Mark Berry for Pocket GPS
Mark Berry a regular in the forum as (Mark R Penn) has put together some in-car
photos to show off how he's hidden the mass of cables that seem to spread and
multiply when using Pocket PC's and GPS Receivers in the car.
I must say he's got the cables well hidden!
Not one can be seen, and the setup is very neat!
Mark says...
To make the cradle, I took an old HP 548 serial
cradle (mine is actually a USB cradle converted to serial, so I have 2 wires
where the normal serial one has a single combined power and serial cable), and
removed the part that supports the Jornada, from the base. This is easy to do -
just unscrew the metal base, and then you have access to 2 screws that hold the
actual cradle to the base unit.
Next, I cut down the PDA bracket that came with the Teletype receiver, and fixed
it to the back of the cradle with 2 small (M4) bolts. There are any number of
brackets available from car accessory shops - it doesn't matter what's on the
front of it, as you only want the bracket!! This then allows the cradle to be
fixed to the dash, and, if you've obtained a descent bracket, to be angled for a
perfect view.
I've cut away the front face of my cradle to accept the MMC battery, but if you
have the standard battery this step is not necessary. A small piece of Velcro
holds the Jornada in place even with my driving!!
The cables from the cradle pass through a hole cut in a switch blank, and end up
near the fuse box behind the dash, ready to be connected.
Of course you could use the HP 568 serial cradle, but it's not shaped in a way that
makes it so easy to modify for dash mounting. I guess it depends on your car
really.
The receiver is mounted to the dash with a double sided sticky pad, and the
cable is pushed down between the windscreen and the dash, out of site. In my
case it then runs to the right, and ends up inside the dash, close to the cables
from the cradle.
For power (I needed 2 cigarette lighter plugs, because the Jornada has a
proprietary power plug which the power lead that came with the recover won't
fit), I bought a 4 way extension lead from Halfords (about Ł9), and cut the plug
end off. I then connected that to the power leads going to the factory fitted
cigarette lighter, underneath the centre console, using crimp type connectors.
The extension lead is then run under the console, to behind the dash, again
close to the cables from the cradle.
Final step - connect it all up!
I had a null modem adapter, which connected the
serial cable from the cradle to the serial cable from the receiver, a power lead
for the Jornada which plugged into the 4 way extension lead and connected to the
power lead from the cradle, and the power lead for the receiver, which also
plugged into the extension, and then connected to the PS2 connector for the
receiver.
The whole bundle of wires and connectors was then wrapped in tape, and tucked
away inside the dash. You do have to be careful that none of the wires are going
to get caught up in the steering mechanism, but a few bits of tape or some cable
ties can sort that out.
I left the PS2 connector hanging below the dash where I could get to it, because
very occasionally I have to reset the receiver by powering it of and then on
again.
The whole setup now has NO visible wires, is angled perfectly for an easy view,
and is close at hand for tapping at menus and even using other apps (not while
driving of course!!!). All I have to do when I get in the car is start Navigator
and drop the Jornada into the cradle.
I also have no TTFF problems at all (it's
absolutely instant) because the receiver is always on.
|

Modified HP Jornada 548 Cradle mounted to the
dashboard
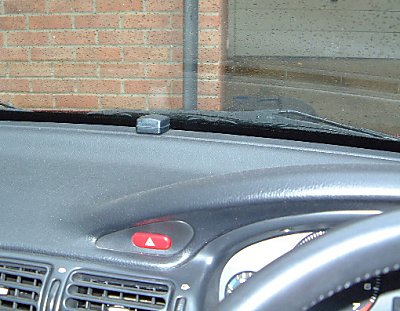
Teletype GPS Receiver mounted smartly on the
dashboard

Accessory Socket still accessible with 4-way cable
hidden beneath
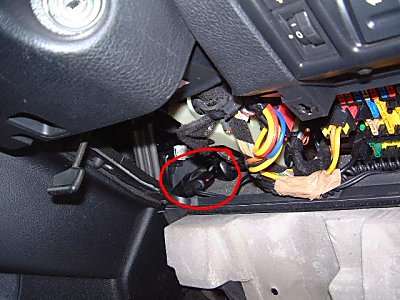
4-way Extension lead tucked under dashboard

Null Modem and all the cables wrapped in tape
inside the dashboard |


