| Review by Lutz Bendlin
Introduction
The TomTom GO 910 and its little brothers 510 and 710 have been out for a while now, and had their fair share of shouting at already. So let's have a closer look under the hood of the GO 910, to see what the fuss is all about. Along the way we will also handle a few other topics that are equally interesting for the other GO devices.
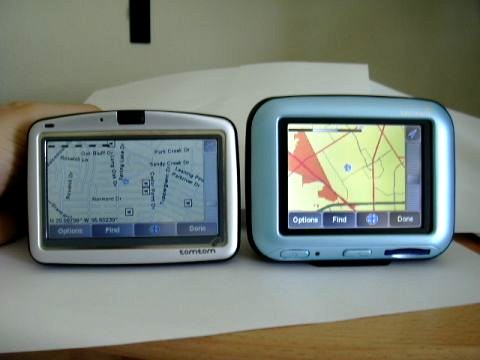
The most obvious change is the screen. It is now in a 16:9 format, ideally suited for displaying movies.
Here are some measurements:
WQVGA (?) (480x272) display: 8.7 cm x 4.9 cm = 42.6 cm2 ( 140 dpi)
standard GO QVGA (320x240) display: 7.0 cm x 5.2 cm = 36.4 cm2 (116 dpi)
This means the 910 screen has 17% more screen real estate than the old QVGA display, but also a higher DPI value (dots per inch).
One thing to like about the new screen is the type of TFT used. The old TomTom GO devices (and many competition devices) use a linearly polarized TFT. This can lead to a situation when you don your (vertically polarized) sunglasses and look at the GO's screen you will see - nothing. Turning your head makes you look silly, and improves the situation only marginally.
The new TFTs used on the GO 910 seem to use a different technology, and will no longer interfere with your sunglasses. A very welcome improvement.
Did we say movies? This is the one thing that the TomTom 6 program doesn't support! Well, not natively, but there is a way. More about that later.
And no, you should not be watching movies while navigating. But then you shouldn't look at photos either. But your copilot or your dear pension providers (aka "kids") will certainly appreciate the movie more that they will your driving virtuosity.
The design
During CeBit we happened to bump into the case designers for the new GO range, and they asked me how I like the case. Boy, did they regret that question. I told them it looks and feels like a Garmin. (Since then Garmin have dramatically improved their case designs. The Garmin UI still is a catastrophe)
The front bezel is still removeable, and theoretically you could exchange it with one of a different color to customise your device. I haven't seen any replacement bezels on the market though - I think this is a missed opportunity.

What I do particularly dislike is the apparent move of the center of gravity into the upper half of the device. It no longer rests in your palm, or on a surface. Instead it rocks around and tries to tip over whenever you are not watching. The speaker is also pointing downwards, which is not helping the sound quality. When the GO stops rocking it lies on a flat surface under such a bad angle that it is not watchable without a mount.
Which brings us nicely to the...
Mounting Problems
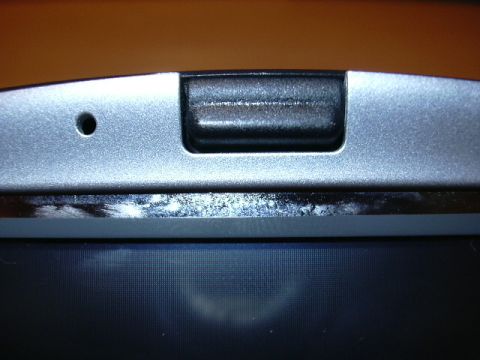
We did tell TomTom early on in the beta testing process that we didn't think the mount is up to the task. There was another change from the previous GO range - the release mechanism is now on the top which means it is no longer possible to remove the GO from the mount with one hand. Very annoying in my opinion, and not at all user friendly.
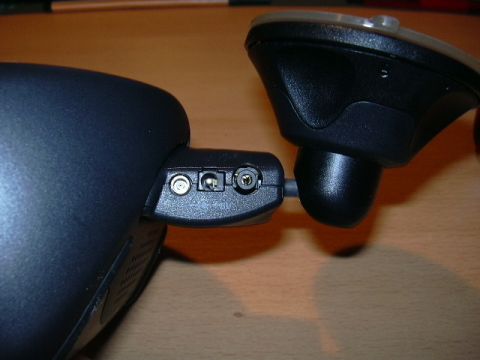
The other thing that stirred emotions up quite a bit is the "drooping" of the mount. The suction cup is supposed to tightly grip the rubber ball of the mount, and prevent any movement when engaged. I don't know if the rubber is to blame, or the sheer weight of the device (by the way, the 910 weighs exactly the same as the 500 !) - in any case the mount tends to give in and send the device downwards.
Note to designers: If you want to prevent vibrations in the vertical axis put something in the way of that movement, for example a mount (as was done with the old GOs). A horizontal mount will always amplify vibrations, rather than dampening them.
The other complaint is the loose contact issue- the mount will disconnect if you ride over a hump. It was suggested to remove the rubber cap in the back in order to bring the contacts closer together but I doubt that will give any better results than when the rubber cup is in place.
There are a few more issues with this mount.
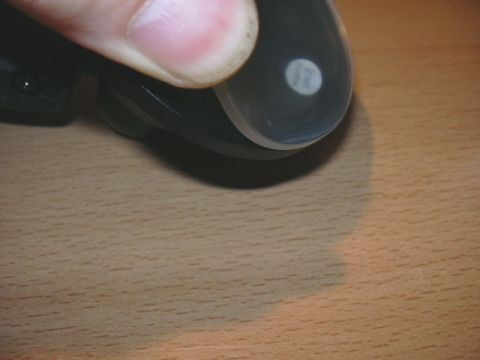
One: The plastic disc behind the silicone suction cup is preventing the cup from getting a good suction on curved windscreens, as you will experience in sports cars, or at the outer edge of the windscreen.
Expect poor suction and a higher likelihood for the mount to cave in in warmer climate and when subjected to intense sun for longer periods of time. It also doesn't help that the suction power is limited by the very mechanism of the mount. I would think that an adjustable suction (through some kind of tightening wheel mechanism) would have helped both the suction and the grip of the rubber ball.
Two: This is much more prosaic - NOTICE TO DRIVERS IN CALIFORNIA AND MINNESOTA: State law prohibits drivers in California and Minnesota from using suction mounts on their windshields while operating motor vehicles. (See California Vehicle Code Section 26708(a); Minnesota Statutes 2005, Section 169.71))
Three: our dear co-inhabitants of the smash-and-grab variety have learned to deduce from the presence of a suction cup mount that there's a likelihood for the device to be stashed away in the glove box, the middle console, or under the passenger seat. Heck, even the mere presence of a mark on the windscreen is sufficient. And even if you were smart and removed the device, you will still have to pay for the window repair.
So what to do about all that?
I didn't like the mount to begin with, so I was looking for alternatives. Sawing off stuff was out of the question, but unscrewing things and looking inside is what we at PocketGPSworld do for a living (sort of). So let's see what we can do about it.
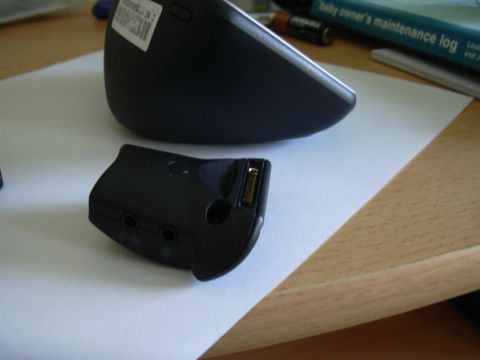
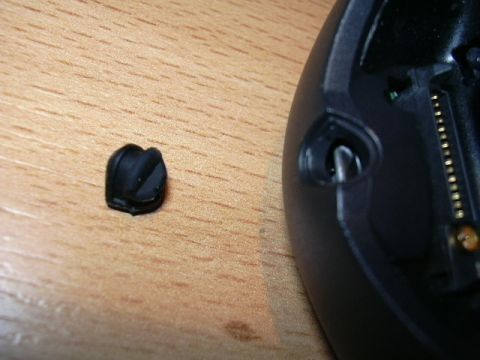
First take the three screws off that keep the upper half of the mount fastened. (You need to peel the rubber cap off the center screw first) . Use a Torx 8 for that step.
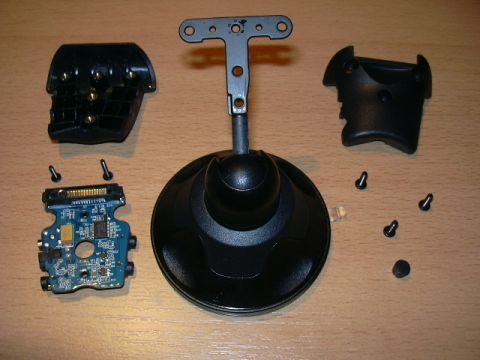
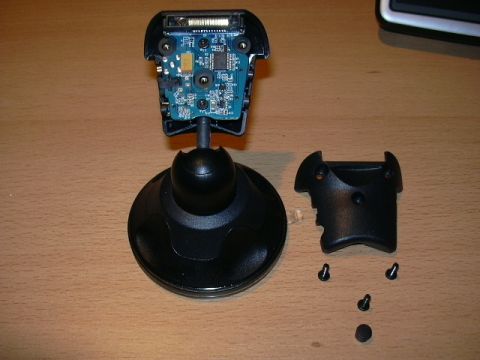
Next remove the two screws in the vertical axis (Torx 5 this time) and remove the PCB. You are now left with the purely mechanical part of the suction mount. As was suggested elsewhere, take the suction cup and throw it over your left shoulder. Then screw everything back together. Don't fasten the T5 screws too tight because now there's a lot of "meat" missing (the T-bar). Be aware that the T5 screws are of different length.

The result - a fully functional connector that - surprise, surprise - can also serve as a desk stand for the 910. No more rocking, and the viewing angle problem is gone too!
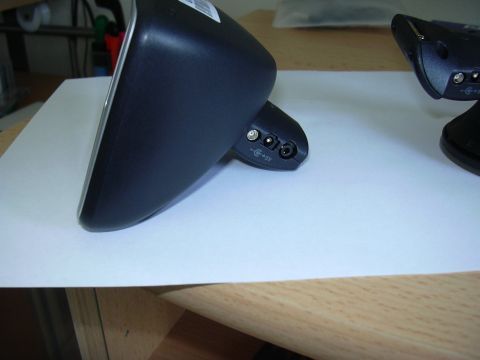
All you need for your car now is a anti-slip mat and a flat surface somewhere on the dashboard. This combination of device and anti-slip mat is ideal for removing the device out of the car without any trace. It is not so ideal for emergency situations though - if you have to brake hard there is a potential that the device will fly towards the windscreen. At least it won't come flying towards you.
What else can I do with the GO 910?
As all the other TomTom PNDs the GO 910 is based on the Linux platform. Normally the operating system is hidden, and only the TomTom program can be accessed. But there are a number of ways you can change that.
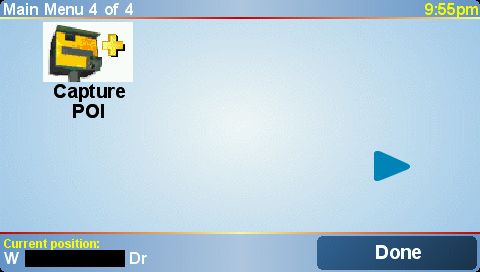
First of all, the GO supports custom menus. Through custom menus you can call external programs. Those can be shell scripts or full blown executables.
Secondly, upon startup the system loads the kernel (ttsystem) into memory, and then before starting the TomTom program (/bin/ttn) it looks for and executes two files cleanup.txt and ttn , both in /mnt/sdcard (yes, the GO910 has a hard disk, but it is symbolically linked to /mnt/sdcard for backwards compatibility). You can use either file to install processes (daemons) or to run one time scripts. The SDK documentation has more details on that, and the excellent site opentom.org will also give you wealths of information.
For example you want to know what custom menu items are contained in the current GO program (which doesn't necessarily mean all of them are supported). For that you need to look into the executable /bin/ttn . However, that file is not directly accessible since it is part of the compressed ttsystem file. So you need to wait for the kernel to uncompress, and then you can grab the file. You would prepare a ttn file like this
cp /bin/ttn /mnt/sdcard/ttn.src
ttn&
and place it into the root of the drive. On the next startup the kernel will finish extracting, and then Linux will copy the TomTom executable to the root of the drive. After that it starts the TomTom executable (if you omit that line the boot process will stop here and the device will appear to hang).
You can then reconnect to the PC, and examine that file with a HEX viewer to find the (supposedly) supported menu items.
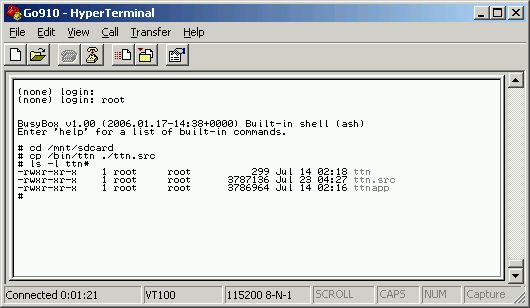
There is another way to get to the operating system, but this requires that you purchase the GO 6 SDK (Software Development Kit), as well as a special serial cable. If you connect that serial cable to the GO's docking mount and to your desktop computer you can use a terminal program like Hyperterm to connect to a Linux shell on the device.
Even an experimental Bluetooth serial connection is available to the people testing the SDK but unfortunately this is not yet included in the standard resale SDK package (I think it should be, it is more convenient than the serial cable).
Talking to TomTom
No, not the company. Here we are discussing how to interact between your third party program and the TomTom engine running on the GO.
The safe but expensive way is to use the SDK for that, and utilize the API (Application Programming Interface) calls that are accepted by the TomTom application. You can find the details of the available API calls in the SDK documentation.
The cheaper but more complicated way is through the use of the file based interaction system. Your program will place a specially formatted text file with a request into the /mnt/sdcard/SdkFileCalls folder, and the TomTom application will at leisure look at the request, and then if nothing else is going on, will delete your request file and place an answer file into the same folder.
That way you can use pretty much all of the API calls, just in a more pedestrian way. The good thing about this is that it can be implemented with Linux shell scripts again ... No need for a "real" programming environment.
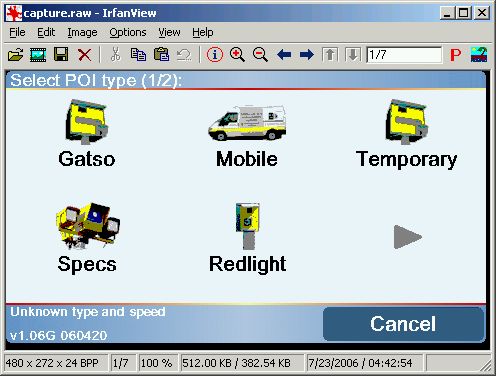
Another question we hear often is "How to do screenshots?" And this is not just for the TomTom User Interface (where TomTom have included a way to do screenshots), but also for third party programs.
In Linux you do screenshots by copying the frame buffer (the raw display) to a file, and the converting that raw file to a usable format. So from a shell or shell script you would issue the command
cat /dev/fb > /mnt/sdcard/capture.raw
Depending on what you want to achieve you may also want to include a delay into that script.
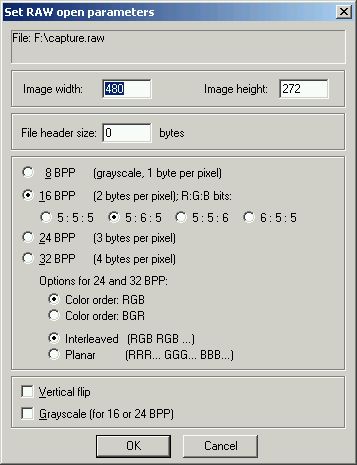
You can then connect the GO 910 back to the computer and open the capture.raw file with a program like Irfanview and convert it to JPG or whatever format you prefer.
Watching movies on the GO 910
You probably have heard about the Makayama Media Studio for the GO series. Apart from the re-encoder that runs on the Windows desktop this software relies on a special version of mplayer for Linux on the GO. For whatever reason the TomTom version of mplayer is crippled and does not play music or videos that are longer than 15 minutes. The Makayama version does not have that limitation.
The Media studio is currently serving the older GOs (with the 4:3 screen aspect ratio) but an updated version for the x10 range should be out soon.
So, let's have a quick look into the demoplayer.sh script in the bin folder and then start the proper mplayer with your video file
cd /mnt/sdcard
./mplayer/mplayer -vo fbdev -fb /dev/fb -framedrop -v 2 -slave -loop 0 ./media/wr1.avi
and voila, the video is playing nicely. (Make sure TomTom is in a static window, otherwise it will mess up your video screen all the time).
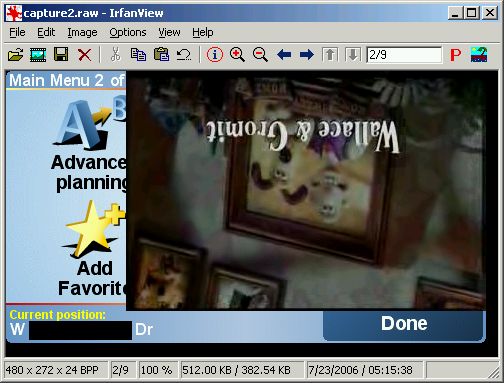
Of course you still need to tinker with the mplayer parameters to rotate the video properly and stretch it etc., but you get the idea. The good thing is that most desktop videos will play just nicely. But you will probably want to re-encode them for the 480x272 resolution and pre-rotate them, either with the new Makayama Media Studio when it is out, or with your favorite re-encoder.
A similar approach will work for the older GOs, the only difference is the smaller screen size.
To start the video(s) you could use the TomTom custom menu, or write your own shell script that does all the file handling. The options are endless...
How about GPS data?
If you want to use the GPS position in your programs you can either ask the TomTom application for it through the SDK. But that is very slow, and not always reliable. It is much easier to go directly to the source, and listen in to the stream that the GPS receiver is sending.
Physically this will be a different port depending on the device (GO, Rider, One etc) but thankfully TomTom have again symlinked this throughout the whole range, and you can access it through /dev/gpsdata . You can open this device, listen in to a second worth of data, and then close the device again. For demonstration or data logging purposes you can also dump the entire GPS data stream into a file, like this
cat /dev/gpsdata > /mnt/sdcard/NMEAlog.txt
Linux will give you more options to manipulate this data, so for example you could only filter out the lines that contain the RMC string. You can do this multiple ways, one of them is shown here (everyone please bow to the grandfather of all search engines, grep)
grep GPRMC /dev/gpsdata > /mnt/sdcard/NMEAlog.txt
The Linux kernel that is used by TomTom has a pretty complete implementation of BusyBox, the "Swiss Army Knife of Embedded Linux". So go forth and code...
This concludes the review, I hope you like it. Since it was called "Inside the GO" we'll also show you some pictures of the inside - so you don't have to open the device and void your warranty .
Some pictures from the inside
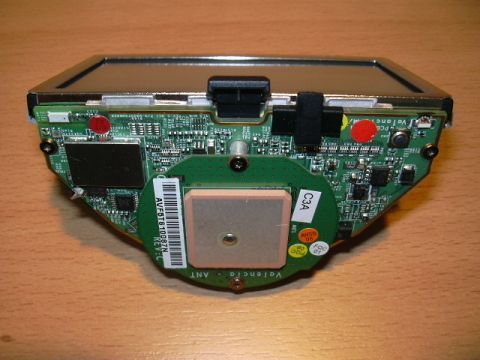
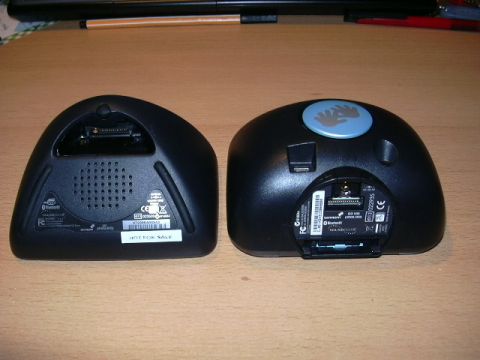
The PCB and the GPS antenna. On the left hand side you can see the ambient light sensor that can control the switch between day and night colors as well as the display brightness for you. Nice to see that old iPAQ design being revived.
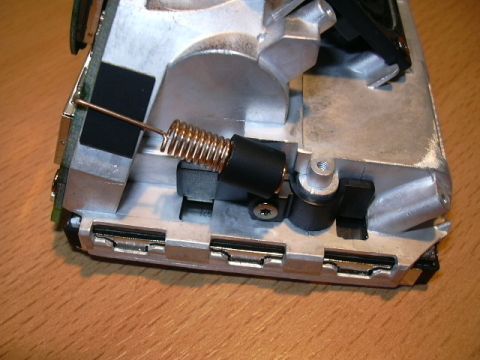
This coil should be the Bluetooth antenna. Note the very solid construction of the case.
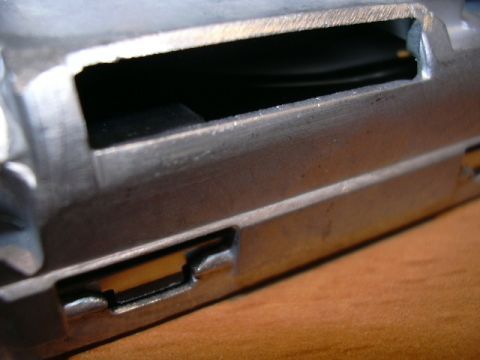
Sneak peek at the hard disk of the 910 - the other devices have the SD card slot here.
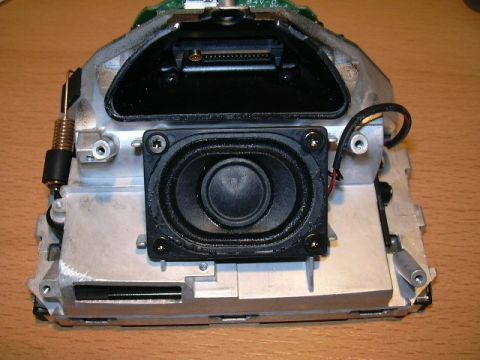
The speaker is much much smaller than on the older GOs, and consequently the sound isn't as good. It still outperforms the competition though, mostly thanks to the solid metal body and tight fastening of the speaker. No annoying vibration of the case (like on the Mio C710)
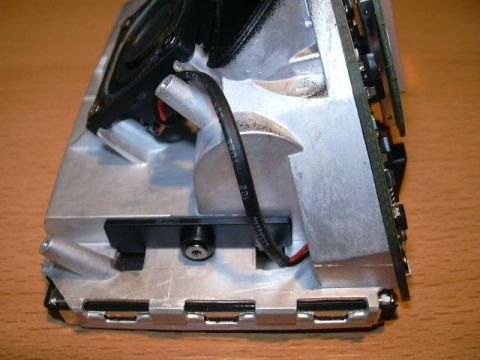
Another look at the body - it is made out of sturdy aluminum (aluminium for the Europeans) .
Conclusion
The GO 910 is a powerful navigation device. It features a mature user interface and a solid navigation engine. It is pulled down by poor design, particularly for the suction cup mount, and by the relative performance degradation when compared to the older GO devices.
Unique features of the GO910 are Text To Speech (unique only through enforcement though), a huge 20 GB hard disk that stores all the TomTom maps for the whole world if necessary, and an ambient light sensor to control color switching and display brightness.
If you like to explore the true potential of this Linux device then there is an unlimited playground in front of you. Easy interaction can be done through scripting, for properly compiled programs you will need to purchase the Software Development Kit. |


