
Click here to go to the PocketGPS Safety Camera Database
CoPilot Live Instructions
Introduction
Installing the Pocket GPS Safety Camera Database to CoPilot Live, or any other Customisable POI's for that matter will require virtually a complete re-install of CoPilot Live
on the Pocket PC, and is an extensive task to carry out. Before doing so we do suggestion you use Pocket Backup to backup your complete ROM/RAM to Storage Card, and also make a complete backup of your Storage Card to your PC, just in case something goes wrong, or you select a wrong option this way you can get back to how you had CoPilot Live installed quite quickly. Please also note that these instructions are not for the faint hearted. We have documented nearly every step, so following this document should make life easy for you, but it is still quite extensive and may take an hour or more to complete.
- pocketgps_uk_gatso.*
- pocketgps_uk_redlight.*
- pocketgps_uk_specs.*
- pocketgps_uk_mobile.*
- pocketgps_uk_temp.*
- pocketgps_continental.*
and a single , all camera types, file
which is only available in the ZIP file download.
*Note* If you are not seeing the rest of the page after this line it is because our download server is currently offline. Please check back later!
CoPilot Live Review
- Read UK Review here
- Read US Review here
Downloading the Pocket GPS Safety Camera Database
- Download from Pocket GPS Safety Camera Database page
Extracting the Database on the PC
- Extract the ZIP file contents to a directory on your PC
- In Windows XP right-click the .zip file and select "Extract Files Here..." or use a program such as WinZip or WinRar to extract the files
- Run CoPilot Live
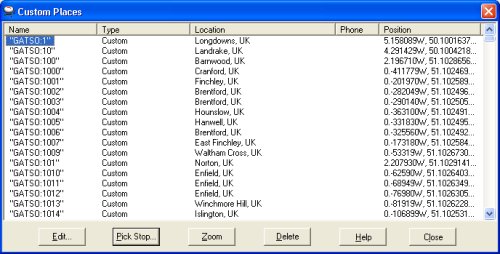
- Click Tools | Manage Custom Places and delete any Cameras you currently have listed here by highlighting the first camera, then pressing SHIFT+END and then clicking the DELETE button, followed by CLOSE.
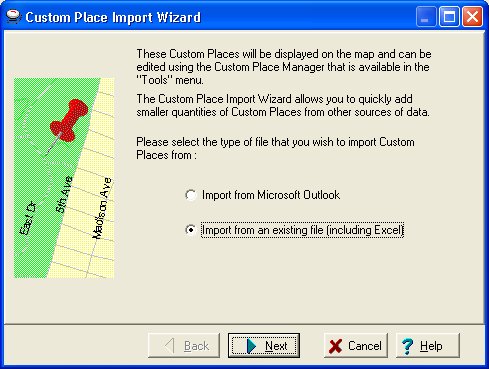
- Click Tools | Import Custom Places and select Import from an existing file (Excel) and click NEXT
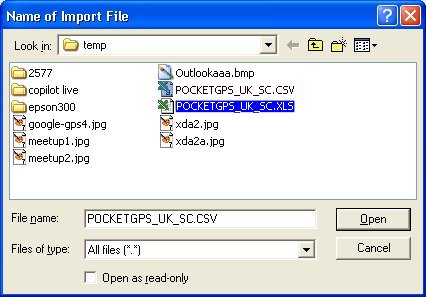
- Click BROWSE and change FILE TYPES to ALL FILES and then point to the POCKETGPS_UK_SC.XLS and double click.
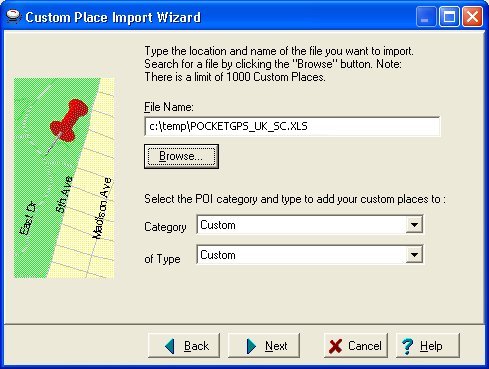
- Make sure that the Category and Type are set to Custom and click NEXT
- Click NEXT
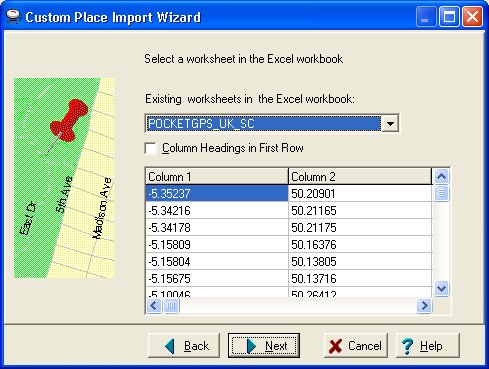
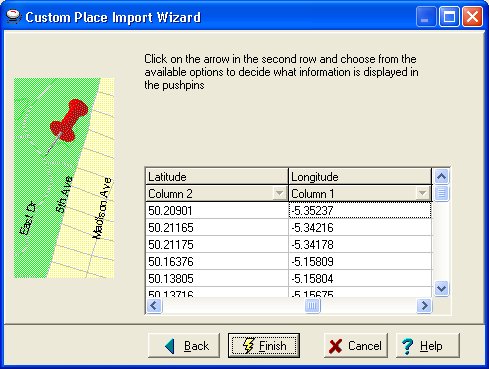
- Under the NAME column, pull down the SKIP box and select Column 3. Scroll right until you see LATITUDE and change the SKIP box to Column 2. Scroll right and change the LONGITUDE to Column 1 and click FINISH. CoPilot will start importing the database.
- CoPilot will start interrogating the database
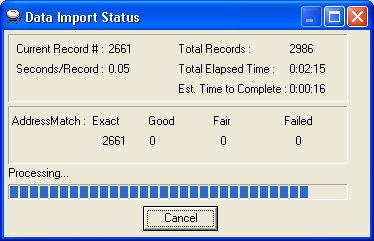
- On the following screen, you should be able to check the exact matches to roads for each speed camera. Make sure the INCLUDE option is selected and OVERITE EXISTING PLACE is selected and click ADD. It may appear that CoPilot hangs for 4-5 mins or isn't doing anything, just wait and eventually it will complete the import.
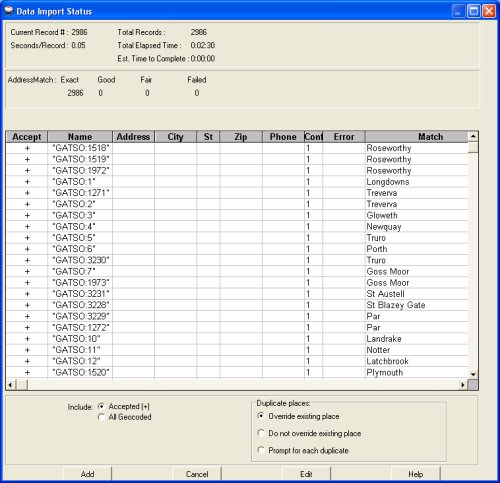
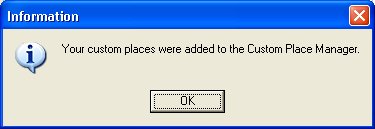
- When completed, you should see a message like this. Click OK and the cameras are now imported into CoPilot Live.
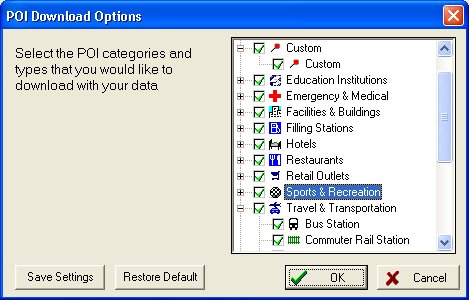
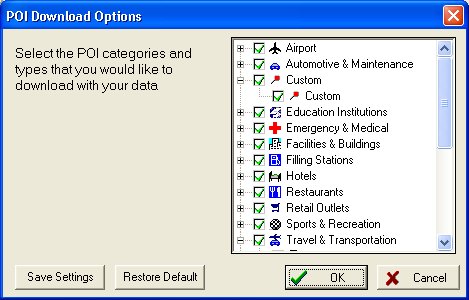
- Click EDIT | POI DOWNLOAD OPTIONS and make sure you expand the CUSTOM branch and tick each entry. Also expand the TRAVEL & TRANSPORTATION branch and untick SPEED CAMERA (otherwise you will get duplicate warnings!). Now click OK.
-
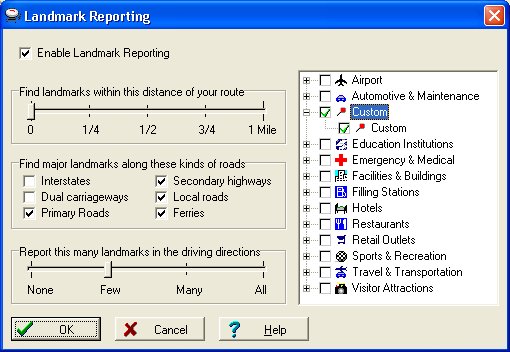
Click TRIP | LANDMARK REPORTING, click ENABLE LANDMARK REPORTING, set the first scale to 1/4 MILE, select INTERSTATES and DUAL CARRIAGEWAYS, and to report ALL LANDMARKS. Make sure you also select CUSTOM, expand the branch and make sure CUSTOM is selected, then click OK.
-
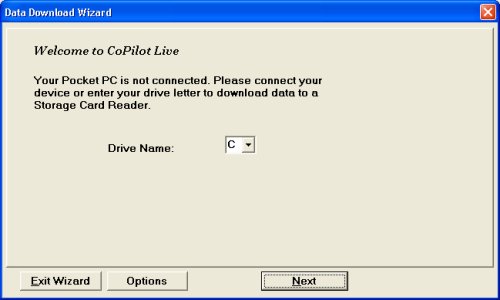
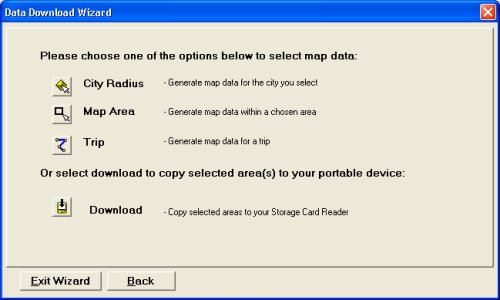
Click DATA DOWNLOAD WIZARD to transfer the new changes (and maps) to the Pocket PC. Unfortunately as the POI's are part of the maps, you will have to re-transfer the maps to your Pocket PC. Select your C: drive
-
click OPTIONS and expand the CUSTOM branch and make sure CUSTOM is ticked. Also expand the TRAVEL & TRANSPORTATION branch and untick this (otherwise you will get duplicates). Now click OK.
-
Click NEXT
-
Now you will need to re-select the maps areas you originally downloaded. If you want the full UK maps, then the best thing to do is select MAP AREA and highlight the area on the map.
-
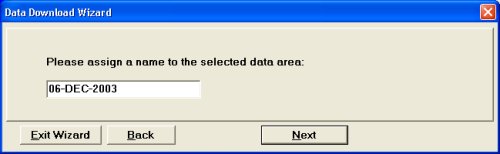
Once you've selected the area of the map, give the new data set a name. A good thing to use is the current date. Then click NEXT.
-
Now the map segments are ready, click DOWNLOAD.
-
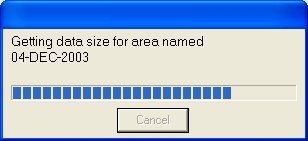
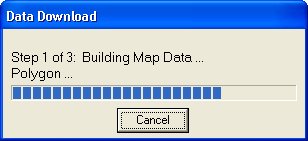
This will start merging the data that is required.
-
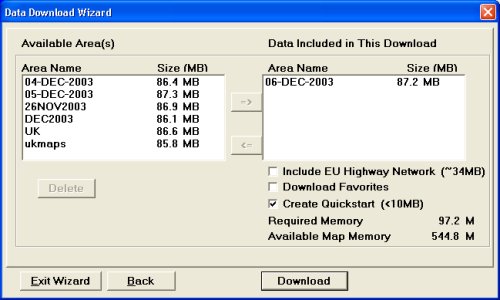
Once completed you should see a screen like below. On the right hand side you will see the newly created dataset, if you want to include EU Highways, select EU HIGHWAY, if you have favourites created on the PC and want to transfer these to the Pocket PC, select DOWNLOAD FAVORITES (beware that any favourites already on your Pocket PC will be deleted!). If you want to create a QUICKSTART directory, select CREATE QUICKSTART. Once you are ready click DOWNLOAD.
-
Now select which operating system you are using. If you are using WM2003, select Pocket PC 2002. Also select the Speech type you want installed. Now click OK.

-
CoPilot will now start creating the data on your C: drive. This will take quite a while to complete.
-
Once complete you will see a screen like the following. Click FINISH.
-
That's it, well not quite! You now need to copy this install to the Pocket PC. Open Active Sync and click the EXPLORE button. Browse your Pocket PC Storage Card and in the root directory should a COPILOT LIVE directory and also a 2577 directory (if on your original install you selected the QUICKSTART option). Delete both of these directories! Now copy both directories from your C:\ to your Pocket PC Storage Card. Once complete, wait a couple of minutes for the copy to finish, and then you can safely undock your Pocket PC.
-
Now run CoPilot Live on the Pocket PC. You need to make sure you bring up the bottom menu and tap TOOLS | OPTIONS | MAP and enable the DISPLAY POIs option then tap OK.
-
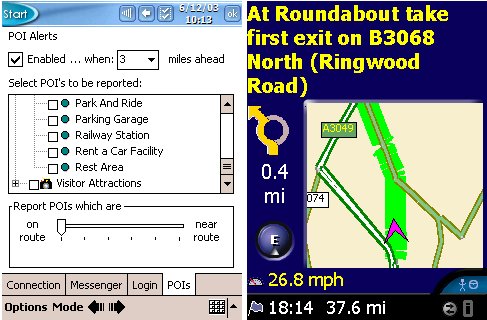
Now tap TOOLS | LIVE | POIs and make sure you tick the ENABLED option, set the MILES AHEAD to 3, expand the CUSTOM branch and check that the only option that is selected is the CUSTOM one unless you want to be notified of others. Also make sure that you don't have a SPEED CAMERAS option under the TRAVEL & TRANSPORTATION branch, if you do, make sure it is unselected. Make sure the slider is set to ON ROUTE and tap OK. Now make sure you exit CoPilot Live to save these settings.
-
That's it, you're done! CONGRATULATIONS!
|


