|
Review by Lutz Bendlin
 Brodit mounts have a good reputation in Europe. Now they are available in the US too. A particular site
Ipaqcarkits.com has been recently added to the lineup, and we have used that event to test some of the mounts on offer. Brodit mounts have a good reputation in Europe. Now they are available in the US too. A particular site
Ipaqcarkits.com has been recently added to the lineup, and we have used that event to test some of the mounts on offer.
Selecting a Brodit mount is a two step process - you need to choose the device specific holder and the car specific mount. The website suggests to start with the holder but eventually that order is completely up to you - so let's start wit the car mount...
Car specific mount
On the Ipaqcarkits.com website you select your car make, model and year, and then you will see a list of available mounting options.
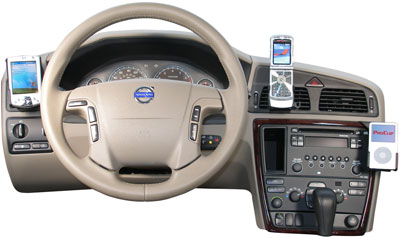
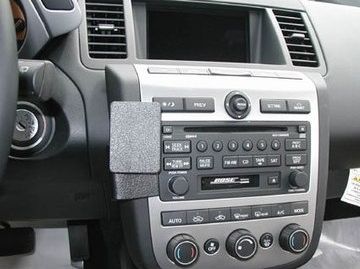
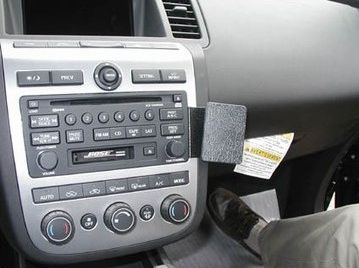
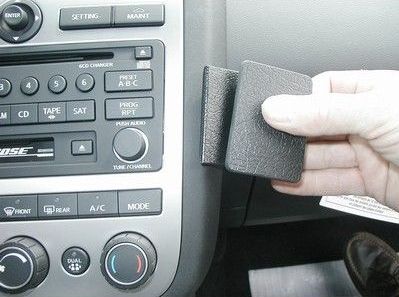
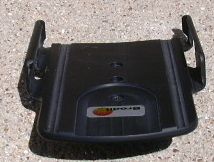
Thankfully the car make and model listing is much more exhaustive than the European site, and contains all car makes sold in North America (at least all that I know). My car is a 2003 Nissan Murano, and there are two options available - Left and right of center console as shown in the images above. The Murano has very oddly shaped vent outlets, so a vent mount cannot be offered.
Each mount is about 30 USD. For the purpose fo this review I have ordered both options, and installed them both.
Installation instructions
Here is an example of the installation instructions for the base plate, taken from the Ipaqcarkits.com web site (with their permission). Instructions are very simple, and you have fastened the base plate without any tools before you can even say “Wonder if that will really fit in my car?” Yes, it will.
1.
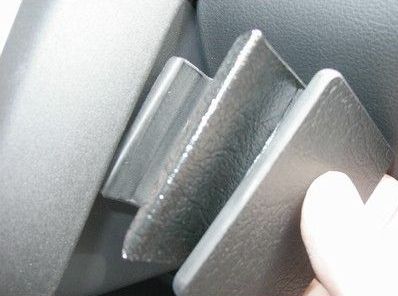
Peel off the cover of adhesive tape on the ProClip and place it in your hand so the three center lined holes are towards the top.
Press the angled edge on the right side of the ProClip into the gap between the console wall and the padded edge.
2.
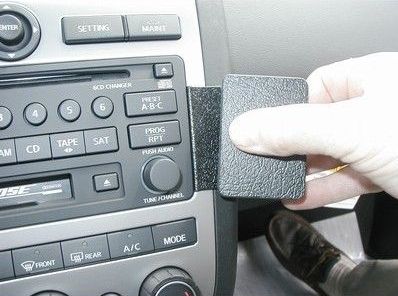
Flip the ProClip over the padded console edge, towards the stereo.
3.
Place your fingers on the right side of the ProClip and press the ProClip towards the stereo so the angled edge on the left side of the proClip snaps into the gap between the stereo and the surrounding panel frame. Press forward on the right side of the ProClip to make sure the angled edge is all the way into the gap.
The ProClip is now in place as shown in the overview picture above.
 The double sided tape can be used to give additional grip, but the mount will also hold without the tape. If you prefer a completely non-invasive attachment to existing car features (with the option to remove it again without traces) then simply don’t use the tape. The double sided tape can be used to give additional grip, but the mount will also hold without the tape. If you prefer a completely non-invasive attachment to existing car features (with the option to remove it again without traces) then simply don’t use the tape.
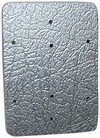
The result if this sub-20 second exercise is a very sturdy face plate that can then be used for all kinds of adapters and holders. The face plate is directed towards the driver.
The face plate already has some pre-drilled holes but you can also “drill your own”. You can also glue/screw other adapters on, for example the HR 4-prong ratcheting system plate.
I have fastened the device holder base to both face plates, and was able to use the pre-drilled holes.
This allows me to quickly connect a device holder to any of the two mounts. You could also use that approach if you need to move device holders between cars.
Device specific holder
 The next step is to decide on the device specific part, or holder. For this review I used an iPAQ 6315 and a Xda Exec (HTC Universal). The next step is to decide on the device specific part, or holder. For this review I used an iPAQ 6315 and a Xda Exec (HTC Universal).
The holders always come with a swivel plate to be fastened to face plate. The screws are also provided. This is the only point in the process where you need a screwdriver, and it’s just to fasten two screws.
 All Brodit holders are of the "slide in" variety. I do very much prefer these to the ubiquitous clamp type holders. With a "slide in" holder you are always on the safe side, a clamp holder may give way and send your device flying around. All Brodit holders are of the "slide in" variety. I do very much prefer these to the ubiquitous clamp type holders. With a "slide in" holder you are always on the safe side, a clamp holder may give way and send your device flying around.
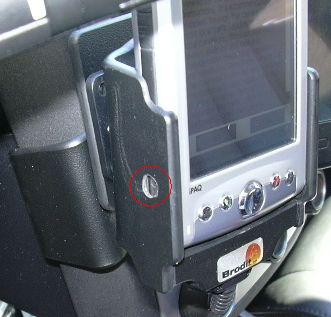
The holders are made of ABS plastic , bent and CNC processed to fit the device. For example, in the picture to the right you can see the cutouts for the Universal's rubber feet and camera hole.
Holders are pretensioned, and you have to push in the device with some effort. First I was wary about the possible wear and tear this could affect onto my devices, particularly the rubber side grips on the iPAQ. But so far I haven't seen any marks or scratches from inserting or removing the device, despite doing that multiple times a day.
This simple design is amazingly catering for the majority of scenarios, even though it doesn’t always work perfectly. Examples are missing holes for the speaker on the Universal, or for the reset button on the iPAQ 6315. But this can be fixed quickly if you are able to spell the word Dremel.
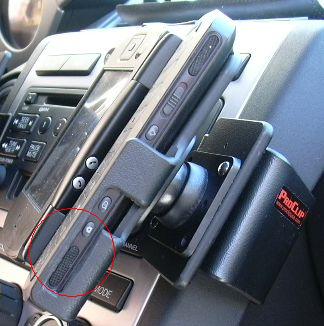
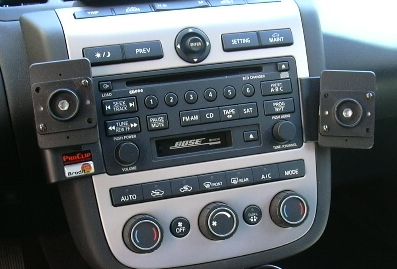
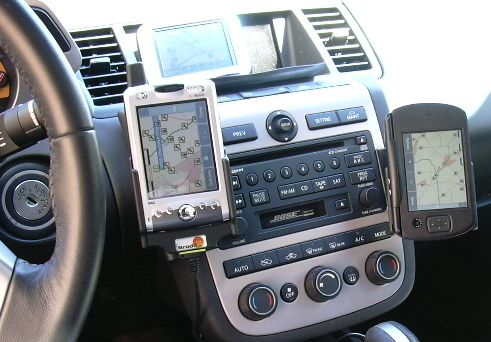
Here you can see the final result - two very neatly mounted Pocket PCs, the left one with active power supply so it gets charged every time it is inserted into the holder, whereas the right holder is passive, without providing power. Passive holders cost around 35 USD, active holders range from 50 to 100 USD depending on the connector type (the fixed install type being on the high end of the range)

Thanks to the swivel mechanism the devices can be quickly rotated to landscape mode...

... or portrait mode - whatever is required by the application you are running. In landscape mode a large part of the car stereo is covered, but that is not a problem in modern cars where the car stereo controls are integrated into the rule.
The left mount is pretty close to the ignition, and you will have to be a bit more focused when trying to insert the key. However it is still easy to do, and anyhow not something you do every five minutes.
Note how seamlessly the Brodit mount can support the different screen configurations of the HTC Universal. This left me reasonably impressed, and made it much easier to cope with the missing active mount.
Passive or active holder ?
Active holders are capable to provide power to the device when it is inserted. Active mounts are not always possible. The power/USB jack on the Universal is at the back side of the device, and sliding the device into the holder would not be possible with the power cord inserted.
As an alternative they provide a passive mount plus a dangling power cable that you are supposed to plug in after you slid the device in. Hmm… Of course you will forget to pull the cable again before removing the device from the mount.
On the iPAQ the power connector is at the bottom, and the active mount works perfectly - when the iPAQ slides in it connects to the power socket.
There are a few different types of Active mounts – most notably with incorporated (but removable) sync cable or hard wired for in-car installation. While the Sync cable version sounds appealing - it is cheaper because you use your existing cable - I have made the experience that it is much more susceptible to minute size tolerances of the Sync cable, which may lead to a situation where the device cannot slide in properly into the connector because it is ever so slightly off center.
I eventually had to use a file and some sticky tape to change the connector position such that my iPAQ would be able to slide in. Another iPAQ holder (with direct car power wiring ) had no such problem, it did fit perfectly from the very start. My recommendation thus would be to invest in a fixed connector even if that may be a bit more expensive.
Conclusion
Both mounting options turned out to be pretty low in the viewing field, close to the car stereo. I would have preferred them further up on the dashboard, but that is entirely dependant on the car construction. On the positive side these locations are “familiar” to the hand, so operating your device will feel very natural. You don’t have to lean over extensively like it may be the case with a windscreen mount. Particularly the left side mount is very close to the steering wheel and you barely need to move your fingers to operate the device.
(interesting tidbid: There seems to be a law in California forbidding any devices that are attached to the front windscreen by way of suction mount. This would mean a dashboard mount like the ones offered here is the only choice if you want to park your mobile navigation enabled car on one of the highways there.)
As a result these mounting solutions provide a true value add to your navigation experience. The device is securely fastened, can be rotated easily, and - with an active mount - will be charged while in the holder.
Pro's
-
A big plus – no car was harmed in the process
-
the mounts look professional and blend in with the overall car interior
-
the mounts are nearly vibration free
- Very convenient and nearly tool-free installation and setup
- Majority of North American car models and mobile devices supported
Con's
- not always possible to have an active holder depending on device design
- limited number of fastening options, dictated by the car design
- pretty expensive. Combination of car mount and device holder costs about 100 USD
|


