 Review by Mike Barrett Review by Mike Barrett
Overview
Navman are well known for their pioneering GPS sleeve solutions. Starting (in the iPAQ PDA world) with the 3000, then more recently releasing a new sleeve with the 3400/3450 that Dave reviewed here. This sleeve is now used as part of the first Navman Topographical product: the GPS 3300 Terrain: SmartExplorer.
The SmartExplorer package consists of 4 components: the GPS Sleeve; a PC oriented mapping application; a PDA raster mapping program, and a set of 1:1,000,000 scale maps of Europe. This package retails for £280 including tax or €429.99.
This review provides a personal view of the 4 components of the package. I used an iPAQ 5450 PPC2002, and a Toshiba Tecra 8000 for the review.
The review is split into four parts: the Hardware sleeve; the PC mapping application; the PDA software and the supplied maps.
What is included in the box?
The review package supplied was the full retail box for the NavMan GPS 3300 Terrain. There seems to be a slight identity crisis here as the documentation refers to the "GPS 3300 Off road". Basically what you get is a GPS sleeve, a windscreen suction mount, a cigar lighter power supply, a software CD and an A4 sized instruction booklet.
 The GPS Sleeve The GPS Sleeve
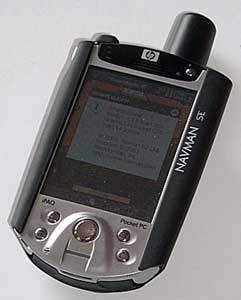
The GPS sleeve is labeled "IPAQ GPS V2" and externally is almost identical to the original 3000 sleeve. The only external differences are the addition of an external aerial socket on the left hand side and the name changing to NAVMAN SE on the front right.
Now my first experience of GPS was using the 3000 sleeve. If I hadn't persisted I would probably not be here today. As you can gather the 3000 didn't inspire me to believe that GPS was a mature mass market consumer product. Indeed the old 3000 often left me stranded in the middle of nowhere having followed the Navigation software blindly with no idea of where I was. Bearing this in mind I was very interested to see what improvements had been made to the sleeve, the performance and the reception.
Well it really is hats off to NavMan. The sleeve really outperformed my expectations. It is as good as any sleeve I have used before and the battery life of the PDA was excellent (for the 5450). In my tests I achieved an average of marginally over 4 hours continuous use before the PDA hit 10% charge.
The first time I used the sleeve I had a fix in my back garden in under a minute. Not believing this I rebooted the PDA and received a second fix in under a minute. Tonight I received a 6 satellite fix on my office windowsill in 15 seconds. 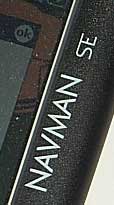 BIG Thumbs up to the NAVMAN hardware development team. Having thought maybe there was exceptional satellite signals or something strange happening in the ether I swapped the new sleeve for my old 3000, 15 minutes later I am still looking at 2 gray bars on the GPS info display, no sign of a fix!! BIG Thumbs up to the NAVMAN hardware development team. Having thought maybe there was exceptional satellite signals or something strange happening in the ether I swapped the new sleeve for my old 3000, 15 minutes later I am still looking at 2 gray bars on the GPS info display, no sign of a fix!!
Those of you who read my reviews and posts know that I am a bluetooth lover since I first got my hands on the Emtac BTGPS. I had to rethink my views slightly when I reviewed the GlobalSat BC305 mouse GPS, and now I may have to rethink yet again for sleeves. Why? Well when I got to think about it a bluetooth GPS has to have a view of the sky. As it is BT with no cables it is often stuffed in a pocket. This must give it a restricted view of the GPS satellites. To a certain extent this has not mattered as the receivers I have tested are all very sensitive. Now to use the NavMan you have to have the aerial exposed to the sky and therefore have the opportunity to receive the strongest possible signal.
The proof of the pudding is in the eating as they say, so how does the sleeve perform in the field. Well I tried it in a variety of different environments, from open marshlands to woodland walks. As I was expecting the Navman 3450 GPS sleeve was more than adequate. In fact whilst in dense oak woodlands I still had a very strong signal of 5 to 7 satellites. This was unknown with my 3000, so do I have a broken 3000 or have NavMan really pulled the rabbit out of the hat?
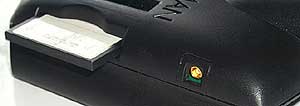 The only fault I could find with the 3300 GPS sleeve was that on some occasions the PDA would not recognise the CF card after a soft boot. Removing and replacing the card solved this problem. The only fault I could find with the 3300 GPS sleeve was that on some occasions the PDA would not recognise the CF card after a soft boot. Removing and replacing the card solved this problem.
Still in the hardware department the bundle comes complete with a windscreen mount and a car power supply. The windscreen mount is again an order of magnitude better than the original suction mount. Though still the same size the suction cup has been replaced with a better more stickier rubber. Again like the sleeve this should now stay put, unlike the earlier mount which used to fall off every hour or so.
The SmartExplorer PC Software
The software comes on a single CD which incorporates the PC software, the PDA software and the map data. When I installed the software I recognised the installation application. The software is a re-badged version of the Navigation Software that can be found in Memory-Map's Navigator, and Maptech's Pocket Navigator. The installation actually overwrote my current Maptech software with a later version of Navman's. The software installed is labeled 3.1.6.
|
FEATURES:
- Upload/download waypoints, routes and tracks into your GPS receiver, or Pocket PC
- Use with commercial OS Landranger, nautical charts, topographic, aeronautical or street maps
- Search and display database of over 250,000 places, hills, mountains, rivers, lakes, farms and forests.
- Draw routes freehand
- Navigate in real time along a defined route
- Elevation profiles of routes
- Attach files (pictures and sounds,etc) to waypoints
- Night vision displays
- Real-time GPS navigation
- Upload map or map section to a Pocket PC
- Calibrate any map format that has geographical coordinates
|
MAP COMPATIBILITY:
- Ordnance Survey 1:50,000 landranger digital maps of the UK
- Getmapping digital Aerial Photographic maps of the UK
- Ordnance Survey 1:250,000 Great Britain Road Atlas
- Philip's Digital European Road Atlas
- A-Z digital street Atlases
- CAA VFR digital charts of the UK
- Maptech worldwide marine charts
- Any digital BSB map or chart (including Maptech products)
- USGS DRG topographic maps
- Download Internet maps
- Create your own geo-referenced maps.
|
PC Software Overview
The PC SmartExplorer software provides the ability to manage your maps and overlays on a desktop computer, and interface to the PDA via activesync to download the data.
What is an overlay? Basically the concept is that you have your base map which is the bottom layer then everything else that is visible is part of an overlay. Overlays are Waypoints or marks, routes, tracks, and positions. These are all covered below. The overlays can be transferred to your PDA along with the maps.
There is also a Gazetteer included with some of the maps, this allows you to find places easily, without having to know roughly where they are and then zooming in. The Gazetteer can also be transferred to the PDA and used in SmartExplorer CE.
The Memory-Map software has a flexible licensing model which enables and disables certain functions in the application. In the SmartExplorer version of the software both the PC GPS and printing features are disabled.
The Software Interface
When you start SmartExplorer you are presented with the last map or chart you had opened. This has a menu bar and tool bar as shown below:

The menu options provide detailed control of the software whilst the toolbar gives access to the immediate and most used functions of the application.
The Chart button opens up the Select Chart dialogue allowing you to open another map or register new maps and charts.
The Props button is probably the most useful button providing access to the property screen for the routes, waypoints, and tracks as shown below. This allows for management of these mapping components.
The Zoom buttons zoom in an out on the current map. There are limits to the levels of zoom available for the displays.
The Scale buttons locate and load maps and charts of a greater or lesser scale at the cursor position. When finding upscaling or downscaling maps the zoom levels stay similar thus when scaling from 1:1,000,000 to 1:25,000 a lot of map data is read in.
This can result in a very long time to rebuild the display. The Alt button displays the Alternative View.
The next five buttons define the mode of the cursor:
-
Drag: Presents a hand cursor which allows you to click and drag the map.
-
Route: Allows you to click and build a route.
-
Mark : Creates (marks) waypoints.
-
MOB: Creates a Man Overboard mark (only valid when GPS active and fixed).
-
Lock: Keeps the GPS position in the center of the screen (only valid when GPS active and fixed).
The Data button when depressed will show the co-ordinates of the cursor, and when the GPS is active the data shows the bearing and distance to the current position.
 The Overlay Properties Dialogue The Overlay Properties Dialogue
The overlay properties can be accessed from the toolbar by clicking on the Props button.
The overlay features basically consist of the three main components as defined above, but there are other categories which appear in the waypoints as well. These are : Proximity Alarms, Hotspots, and Position. These enable quick and easy access to these add on elements to the waypoints.
There is no structure to the overlays so if you need to add structure to your routes or waypoints then a manual system needs to be used. Prefixing all routes for an area with the same code would group them together. For instance all routes in the UK Lake District could be prefixed with LD_. This is not so critical with routes but much more so with waypoints.
Each route can have a large number of waypoints, and by default they are sequentially numbered. Consider the management issues of 200 routes with 50 waypoints each. This would be 10,000 waypoints
Waypoints (also known as Marks)
Waypoints are the basic positioning elements in GPS mapping. Using a standardised identification system, normally WGS74, a specific location can be recorded on your GPS device and then used later to show the position on a map.
Waypoints can be placed on your maps using the Mark button. Pressing the mark button enables the waypoint placement when the mouse is clicked with the cursor over the map. The cursor then reverse back to the drag mode.
The waypoint can be moved clicking on the icon and dragging it to the new location. This can be quite effective when upscaling the map and being able to refine it's location.
The MOB waypoint is a special waypoint for mariners. It is intended to be an easy way to mark the position that an incident occurred, typically a man overboard. This is not enabled unless the GPS is active.
 Waypoints are a good way of checking map calibration as they are not specific to a map and can be displayed on any map where they are located. This means that you can set waypoints at say a church on one map and check that it is positioned properly on another map. Waypoints are a good way of checking map calibration as they are not specific to a map and can be displayed on any map where they are located. This means that you can set waypoints at say a church on one map and check that it is positioned properly on another map.
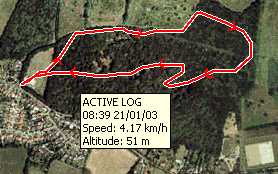
The picture to the right shows a route on Two Tree Island. If you look at the start of the trail the Car symbol in the red circle is the start waypoint if you note there is a hatched red zone surrounding the waypoint. This is the proximity zone.
The proximity zone and a file attachment are configured in the waypoint property sheet. Once configured they will also appear in the Proximity Alarm and the Hotspot sections of the overlay properties.
Routes
Routes are a series of points linked together that you can follow. There can be a number of routes in the routes overlay.
Creating a route is a simple matter of clicking on the Routes button in the toolbar and then just clicking at crucial positions on your proposed journey until you have created your route. Each point you click on creates a waypoint in the overlay library.
You can then process this waypoint in the same way as normal waypoints.
If you need to add an additional waypoint into your route then simply right click on the route and then insert waypoint and then drag it into position. In fact you can change the route easily by using click and drag on the route's waypoints.
The routes that you create on the PC can be transferred to the PDA.
Tracks
 Tracks are essentially a sequence of points that are automatically recorded by the CE application and transferred to the PC. SmartExplorer treats these as a special type of overlay. Tracks are essentially a sequence of points that are automatically recorded by the CE application and transferred to the PC. SmartExplorer treats these as a special type of overlay.
Tracks can be recorded using Pocket Navigator and imported into PC Navigator for analysis. There are facilities to edit tracks by removing erroneous track points, but there are no facilities to add additional trackpoints to cover areas where no GPS signal was received.
You cannot split or combine tracks. There is a feature in the track overlay properties which allows tracks to be reduced. This effectively removes intermediate points from the track, ultimately leaving you with a single line of 2 points.
Multiple tracks can be displayed at a time, and using the Overlay properties you can toggle the track display on and off.
The SmartExplorer PDA Software
The software for the PDA is installed from within the main PC application, the driver for the GPS3300 is also installed from here. Both are required to work correctly. Once again, as you would expect, the software is version 3.1.6, which has some enhancements over the 3.0.2 version of Memory-Map I reviewed. The main enhancement in this release is the inclusion of management facilities for the various overlays.
The main features packed into the CE software are:
- Display of commercial and user created maps.
- Live display of current position using NMEA 0183 GPS interface
- Display and logging of track
- Creation and display of waypoints (positions on your map)
- Display of route
- Navigation instructions based on route
- Tight integration with the PC version of SmartExplorer
PDA Software Overview
The PDA software is very tightly coupled to the PC software. The PC is capable of reading and using many different types, sources, and formats of map data. The PDA software will only work with quick chart format (.qct). All though this might seem a bit strange at first using this method is actually very common and allows large map images to be paged into the PDA effectively and efficiently.
There are really 3 main functional areas: Interfacing with the PC, Navigation and Data management.
Interfacing with the PC is a real doddle. All you need to do is get the PC and the PDA connected using Activesync and then use the menu options on PC to transfer data you also have to download the PDA drivers and software from these menus.
Navigation is simply a matter of switching the PDA on, selecting the correct GPS setting (Navman) and off you go. You do need the right maps available on the PDA first though. There are many options to zoom and scale maps, and to view your position and your track. You can also follow a manually set route using this application.
The data management facilities allow you to create waypoints, and routes. Once created you can organise these using menu options and the new list management system.
Interfacing with the PC
Software Installation
 The PDA SmartExplorer software comes bundled with the PC software. Installation is a little unusual in that it is started from within the PC application. The PDA SmartExplorer software comes bundled with the PC software. Installation is a little unusual in that it is started from within the PC application.
It is a really simple process. All you have to do is connect your PDA via activesync then select Install Pocket Navigator from the PDA menu, Navigator handles the rest. The Pocket Navigator application does not need any licensing as it takes the registration details from the PC application. Once installed all you need to do is download a map and off you go.
The PDA menu is the main control interface between the PC and the PDA. As you can see, from the graphic to the right, this is used to send maps, database items, and to transfer tracks, routes and waypoints to and from your PDA
The Toolbar
 There are a number of icons on the screen which provide status information, or allow fast control of the application. This toolbar is permanently displayed and docked to the bottom of the display. There are a number of icons on the screen which provide status information, or allow fast control of the application. This toolbar is permanently displayed and docked to the bottom of the display.
The first is the menu button which initiates the cascading menu system which is described below.
The next two buttons control the zoom function of the display. The zoom works by doubling or halving the information shown on the screen.
The next button is the Alternative View toggle button. The alternative view allows you to quickly toggle between two different zoom levels of the same map or chart. Initially the alternative view displays the entire map but you can zoom in to say 25% or 50% which can give you a good location view and a detailed position view at the touch of a button.
The padlock button locks the GPS onscreen. When pressed it will have a white background round the icon and the GPS location will be locked in position on the screen, the map will move to keep the GPS position visible. If you drag the map then the lock will retain the current relative position on the screen. If you do not have a GPS fix then the padlock will be grayed out.
The next icon is the data button. When this is toggled and the display is tapped a small data popup is displayed. This shows the co-ordinates of the tapped location, and if the GPS is active the distance and bearing to the point is shown.
The final button is an information symbol. This is normally greed out and only becomes active when there is a problem with the GPS communications. Tapping on this button displays the error message from the GPS interface.
Configuration
 The configuration options for SmartExplorer are accessed from the menu toolbar option Menu-> Overlay-> Settings. The configuration options for SmartExplorer are accessed from the menu toolbar option Menu-> Overlay-> Settings.
This will display the settings dialogue. From this display you can set the main options for the software.
There are not many items selectable the main ones being the Units, and the position display. The units can be set to either Nautical, Statute, or Metric. This will affect the way that distances, and heights are reported.
GPS Displays
 The GPS is configured using the Menu->GPS->Setup option. This displays the configuration screen. The configuration allows for connection to NMEA, None, or NavMan. You then select the comm port and speed and off you go. The GPS is configured using the Menu->GPS->Setup option. This displays the configuration screen. The configuration allows for connection to NMEA, None, or NavMan. You then select the comm port and speed and off you go.
The other GPS related displays provide information about your position and the number and strength of signal being received. The image to the right shows your current position speed, altitude, and average speed.
In this example the system was configured to display British National Grid (OS style), it can be configured to show lat/lon co-ordinates.
The picture to the right also shows the satellite status. This is the only status display in the system. There are no NMEA output, or traditional sky view displays. And yes that really is an 8 satellite fix shown there.
The final element of the GPS is the "Position Overlay" this is the current GPS position. One of the properties of the position is a "velocity vector", this shows how far you will travel if you keep on the same course and speed. The position overlay is the circle with the red dot in the center. The velocity vector is the red arrow pointing to the left of the position.
Marks or Waypoints
SmartExplorer uses the term Mark for traditional waypoints. I am not really sure where "Mark" originated, but Garmin use it on their handheld GPS devices, I guess it probably came from creating a pencil mark on a map.
These marks can be assigned different symbols to indicate what the waypoint actually is. Waypoints can be associated with files making them hotspots. Waypoints can also define a radius around a waypoint making a proximity alarm.
Creating a waypoint is done from the Overlay menu using "Create Mark". Once you have selected this you tap on the screen at the point where you want the waypoint placed.
Waypoints are created with default settings. To change them you need to tap and hold on the waypoint which will bring up a context sensitive menu giving options for: Navigating to the mark, Opening a file, Hiding it, locking it, sending it to the GPS (Garmin or Magellan), removing it, or displaying it's properties.
The properties display enables various aspects of the waypoint to be configured. Firstly you can name it, the default name is "Mark". There appears to be no restriction insisting on unique names so if you are not careful you will end up with lots of waypoints called Mark. A tick box Label indicates if the waypoint name is to be displayed on the map. This is great for primary waypoints such as Mountain peaks, or for naming buoys.
The position is displayed and editable using the co-ordinate system specified in the options setup. This is one way of moving the waypoint to a precise location, another is to simply tap and drag the waypoint to it's new position.
You can associate a file with the waypoint. This makes the waypoint a Hot Spot. You can browse to the required file and select it. A nice, and sometimes confusing, feature is that whenever a file is created in the "my documents" folder whilst Pocket Navigator is running will create a hotspot with the icon set to the icon of the application. As can be seen in the image to the right a screen shot had been taken a few seconds before this one leaving a picture in the my documents folder. The icon for the viewing application is displayed.
The alarm setting creates a proximity alarm for the waypoint. A proximity alarm waypoint is entered in meters radius from the waypoint, and is shown as a hatched red circle surrounding the waypoint as in the picture to the left. When you enter the area of the alarm the PDA default alarm is sounded.
The proximity alarm can be configured in one of two ways a Proximity Alarm as described above, or an Anchor Alarm. The Anchor Alarm sounds when you leave the proximity circle and continues until you are one nautical mile from the waypoint.
The final configuration option is the Icon to be displayed on the map. This can be selected from a small selection of images, or can be the icon associated with the attached file. Setting the default tick box will make this the default icon to be displayed when creating additional waypoints.
 Routes and Navigation Routes and Navigation
Routes are a series of waypoints linked together.
There can be a number of routes in SmartExplorer. Routes can also be created on the PC and downloaded into PDA. You can either create a route on the PC or the PDA.
To create a route tap on Menu> Overlay> Create Route. Then you go to the map and tap at the critical points for your journey, double tapping on the last waypoint. Your route is complete, its as simple as that.
 Oops I made a mistake (I know I don't but lets pretend) a couple of the waypoints are not in the right place. No Problem. All you have to do is is tap, hold, and drag the waypoint to where it should be. Oops I made a mistake (I know I don't but lets pretend) a couple of the waypoints are not in the right place. No Problem. All you have to do is is tap, hold, and drag the waypoint to where it should be.
Forgotten to include a waypoint or need to refine the route more, tap and hold in between the points on the route the select the Insert WP option and just drag the waypoint to it's required position.
 When you are ready to navigate the route all you have to do is tap on the route and select the follow route option. This will start the navigation. As you reach a waypoint in the route the next point will automatically be selected. When you are ready to navigate the route all you have to do is tap on the route and select the follow route option. This will start the navigation. As you reach a waypoint in the route the next point will automatically be selected.
This can be seen in the screen shots to the left and right.
One nice feature is the display of the XTE or cross track error to you and me. This indicates how far off your planned route you are and what direction you need to go to get back on track.
Don't they love TLAs (that's three letter acronyms to you and me) another figure displayed on the screen is VMG or Velocity Made Good. Shows how fast you are going.
And yet again it can be clearly seen that I have a 7 satellite fix whilst under cover of trees. More proof if needed that this receiver is up to scratch.
 Tracks Tracks
Tracks are like breadcrumb trails, they record the exact path that you took on your journey.
You can configure your tracks by tap and hold on the screen and selecting properties. Alternatively you can select the list option from the overlay menu. This will display the track editing dialogue.
From this you can name tracks, colour them and set the point collection criteria. Setting the track to a different colour can often be useful where you have two or more tracks that are in the same vicinity, or cross over.
You can also show and hide the tracks on the map by selecting the show all or hide all option from the overlay menu, or by showing all tracks and then individually select, tap and hold and hiding the ones you do not want to view.
Tracks can be saved as individual entities and then transferred to the PC for later analysis. These can be used on the PC to refine your routes. When you plan a route you look at the map and evaluate where you want to go. The track tells you exactly where you went so next time your route can be more accurate.
What it doesn't do...
As this is so closely related to the Memory-Map and Maptech Navigator products I thought it appropriate to mention what you cannot do with it for those of you who are familiar with the other software.
Firstly printing is disabled.
There are no facilities to connect a GPS other than Navman or NMEA to the PDA.
Although you can configure a GPS on the PC the PC software is not licensed to use it. By itself is not a problem, but it does mean that you cannot upload all your handheld GPS or transfer routes and waypoints to the handheld.
 The Bundled Maps The Bundled Maps
The maps supplied with the package are digital maps covering 25 countries in Europe. Although having said that only the southern parts of Sweden and Norway are covered. This is the Philips Europe Road atlas at 1:1,000,000 scale.
Yes, that really is 1 to 1 million. But it gets worse! unless you live in the UK here the maps are 1:1,300,000 scale A to Z routeplanning maps.
The map to the right is the French part of the European mapset. The image below is a sample from the UK maps.
 Unfortunately for a topographical navigation product this is way to large a scale to be particularly useful. In fact the map detail is far better with the Navman SmartST Pro, which is a true street navigation package. If you are going hiking or mountain biking you do not carry an atlas of Europe around with you, you would have a 1:25,000 or 1:50,000 scale map. Unfortunately for a topographical navigation product this is way to large a scale to be particularly useful. In fact the map detail is far better with the Navman SmartST Pro, which is a true street navigation package. If you are going hiking or mountain biking you do not carry an atlas of Europe around with you, you would have a 1:25,000 or 1:50,000 scale map.
Using other maps
Although the software has a proprietary format for the PDA the PC application will import and convert a number of different digital map formats. These range from the freely available USGS DRG topographical maps, through to Marine charts for most of the World.
If none of these sources have the maps that you are looking for then you can scan and calibrate your own maps. Be sure to check on the copyright requirements for your map before scanning it. This is a bit of a difficult process so would probably be used as a last resort. I will be creating a GPS MasterClass on calibrating maps in the future to help people who find they need to do this.
If you live or want to travel in the UK then you can but Ordnance Survey digital maps from Memory-Map at £39.95 per region (12 regions in the UK), or you could buy either North or South UK at £129 each which covers 6 regions. Having said that you cannot buy the maps alone they come with either discoverer (for individual regions) or Navigator for the North/South maps.
If you live in the United States then you can either download DRG (Digital Raster Graphic) maps from the Internet or buy them direct from a mapping supplier such as Maptech $99 for a single state, or the National Parks set of maps which have the full set of US National Parks topo maps for $49.
Conclusion
This is an excellent package which is let down by the mapset provided. The difficulty NavMan face is that this is a European product so it is not possible to offer detailed maps for all countries and still keep the price reasonable. Personally I would like to have seen this package available in two versions for the UK packaged with either OS North or South map data.
The hardware performed very well in all the conditions that I tested in. With accurate and strong GPS satellite fixes. This sleeve is only available for a limited market of which the only current model is the iPAQ 55xx, which is aimed at the business market, thought there are a lot of older iPAQs still in circulation.
For UK, US Land use and Marine use there are plenty of good quality maps available.
Ordnance Survey Copyright Restrictions
Some of the screenshots shown in this review are property of Ordnance Survey and are protected under copyright law. The screenshots have been used for review purposes only and are
© Crown copyright. All rights reserved. Permission to scan or reproduce these screenshots must be requested in writing to Ordnance Survey.
|


