Overview
The Navman iCN520 is an upgraded version of the iCN510. It is a complete Personal Navigation Device (PND) with all the required components integrated into a small unit that can slip into your pocket.
Complete with a windscreen mount, power supply and remote control all you need to do is to connect the power to a cigarette lighter socket select your destination and off you go. |
 |
What's in the box
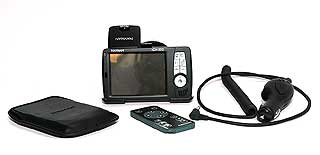
Apart from the iCN520 itself the box consisted of a MM Card with the UK maps on it, an application CD with the SmartST 2005 software and a map CD which held the UK street maps and the Europe basemap. The CD had a TeleAtlas release of 2004.2 which I understand to mean that it is from Q3 of 2004.
There was the usual car windscreen suction-mount holder and cigarette lighter power supply, along with an a.c. power supply with plug fittings for the UK and Europe. Also there was a soft carry pouch and a USB lead to connect the unit to a PC’s USB port.
The paperwork comprised a licence agreement, registration postcard, a handy fold out poster to get you started ‘Out of the box’ and unexpectedly in these days, but more than welcome, a 100 page printed manual. There is also a manual in .pdf format on the application CD.
Naturally all of these were cast asunder with the exception of the MMC and 520 itself. The poster shows pictorially the steps required to get you up and running in the shortest possible time. Slide the battery switch over, insert the MMC and turn it on. I don’t know if the unit had already been used but from the comfort of my hammock in the back garden it didn’t take long at all for the unit to acquire a fix.
|
Manufacturers Specifications
The following specifications have been taken from the Navman website:
|
Technical Feature |
|
Standard |
|
Drive-Away™ – no installation of maps needed |
|
Back on Track™ – if you take a wrong turn |
|
POI (points of interest) |
|
Postcode address search |
|
Voice instructions |
|
Favourite destinations stored |
|
Navigation Views |
|
Turn by Turn |
|
Next manoeuvre |
|
2D Moving map |
|
3D Moving map |
|
Day mode |
|
Night mode |
|
Advanced |
| Nearest POI |
| Multiple route planning |
| Import own POI |
| Speed Camera ICON – import speed camera locations from 3rd party websites** |
| Avoid area re-routing |
|
Map |
Map coverage supplied:
- Pan European (520 Premium)
- Country |
| Map storage (card included) SD/MMC Card |
| Map data available for other countries |
|
Hardware |
| 12V in car power connector and car mount |
| Mains power adaptor |
Processor type:
- Intel PXA-255 300MHz |
Screen Size:
- 3.5” |
| Touch Screen |
| USB connection (for PC map data and POI) |
| Audio out |
| Infra red port |
| Includes remote control (520 Premium) |
|
The hardware review
The 520 itself differs very little from its predecessor, the iCN510. The only physical differences that I could detect, bearing in mind that I’ve seen a few 510s but never really used one myself, were the nice black-look finish and the fact that the ‘Esc’ and ‘Next page’ buttons had been swapped over.
The rest of the hardware, including processor and GPS receiver, is the same.
|
|
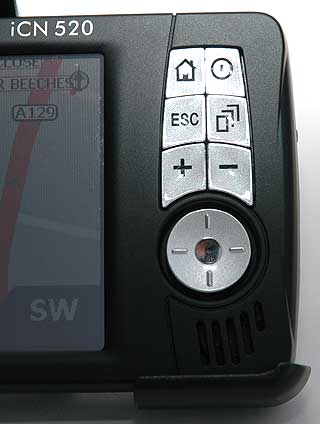
The main controls of the iCN 520 are located on the right hand side of the display.
The buttons have the following functions:
- The house displays the main menu.
- The button to the right of the menu button is the power on/off button
- The esc button is used to move back within the menu system
- The page button allows you to sequentially move through multiple pages.
- The + and - buttons control the zoom levels.
- The final button is a 4 way and enter navigation control. This allows you to move the cursor or selection around and then make a selection.
|
 |
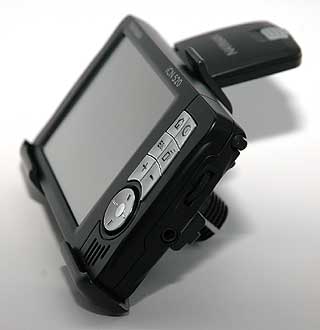
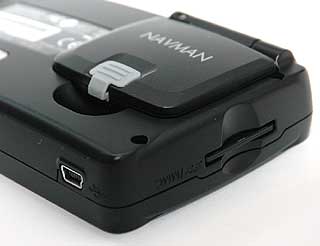
The GPS antenna is integrated into the iCN520. This is a flip type antenna, which can be used in the folded position, but will suffer signal degradation. Normally the antenna is flipped open to a 90 degree position where it will get the best reception.
If you own a car with a coated windscreen or a heated windscreen it is either impossible to get a GPS signal, or the signal is very weak. In this case you will need to use an external antenna. This connects into a socket which is protected by the grey cover.
You can also see the Memory Card slot and the USB connector in this shot. |
 |
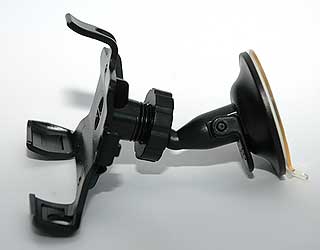
The NavMan iCN 520 is mounted in the vehicle using a windscreen suction mount. This is a 2 part mount consisting of the suction section which connects to the iCN520 using a ball and socket joint.
In use this proved to be very stable. As this is a proprietary Navman mounting system there is no flexibility to explore other mounting options. |
 |
The Software review
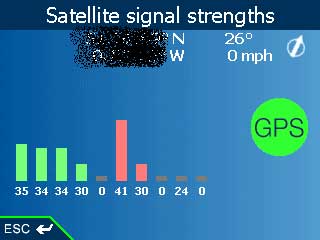
Changes in the software are more apparent. There used to be at least one more page showing the positions of the satellites on a flattened globe. This page, and any others which may have followed it, are now removed in the 2005 software.
|
 |
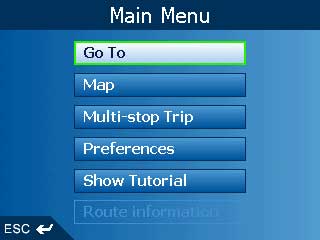
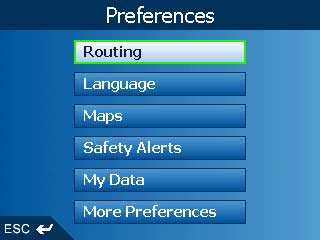
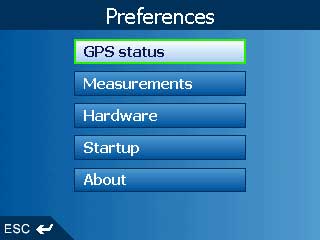
| The Menu system is accessed by pressing the ‘Home’ button. The first screen displayed is the one above, the one to the right appears after pressing ‘Preferences’ and the one below that by pressing ‘More Preferences’. In the screenshot on the right ‘Route Information’ becomes active only if a route has been set and calculated. |
|
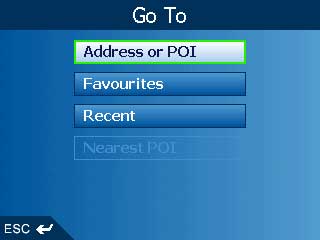
The screen to the right is displayed when ‘Go to’ is selected from the Main Menu. As you can see, you can route to an Address or POI, a Favourite or Recent destination or, when you have a fix, a Nearest POI.
|
|
If you choose ‘Address or POI’ then you get this page. Everything is well laid out and some areas reported by users as missing in V3 are now present.
An example of this that I’d encountered was Surbiton. In V3 I had to search under Kingston, but not any more. |
 |
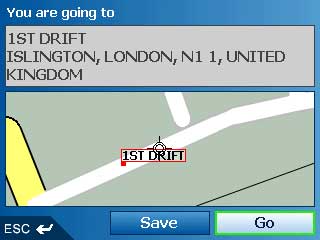
When you have used the Go To pages to find the address or POI you want to go to, you get a mini-map from which you can Go or Save.
You can also highlight the minimap itself and from within that map you can zoom in and move the cursor to fine tune your destination.
You can also zoom out to get a better overview of the area.
|
 |
| Another feature of SmartST 2005 is the My Home function. |
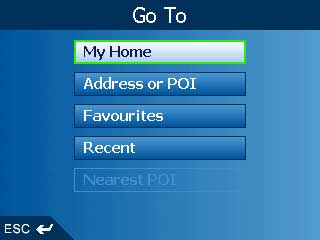 |
| When you have Saved a destination from the minimap you can save it as a Favourite or as My Home. If you set one as My Home it will appear at the top of the Go To page. |
 |
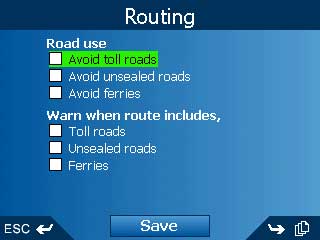
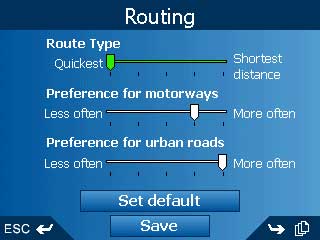
The three screens for routing options were well laid out, but you now have to Save if you’ve altered them.
|
 |
| I found the default settings worked quite well. |
 |
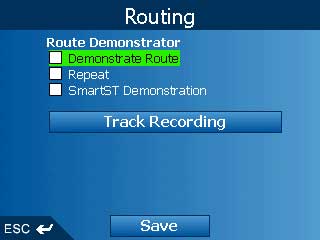
One thing to remember is that if you want to demonstrate a route, you have to tick the box first, then set your ‘Start’ and ‘Navigate to’ points.
Don’t forget to remove the tick when you’ve finished, otherwise you will remain in SIM mode.
Oh, and the demonstration goes at 62mph/100kph no matter what the actual road speed limit is. |
 |
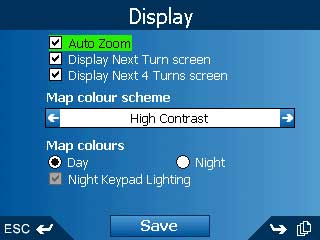
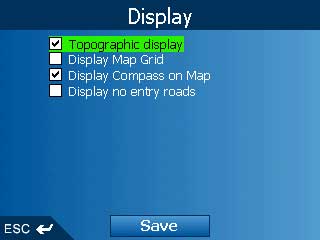
The two Display screens are pretty self explanatory, but one new feature in this software release is the bottom box on the first screen. If you have selected Night map colours then this tickbox becomes active.
If you have a tick here and run the unit from an external supply then the keypad buttons emit a very pleasant blue colour all the time. This function is available on the 520 only, not the 510.
|
 |
| |
 |
Use the Measurements page to set your preferences.
I use the ones to the right but the defaults are Degrees, minutes, seconds and 12 hour clock. |
 |
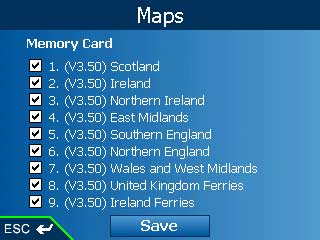
| These were the maps on the MMC when I got the unit. As mentioned earlier I’m not sure if the unit had already been used so I don’t know if these come preloaded or not. |
 |
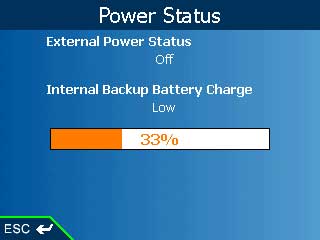
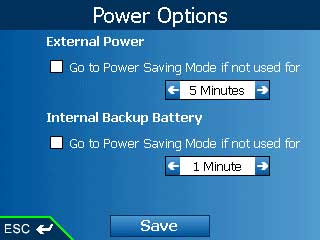
Some more screenshots above, the upper of two showing the state of the internal battery and providing tickboxes for power saving in both internal and external battery modes.
|
 |
| |
 |
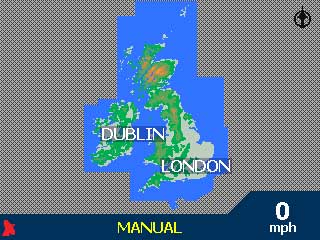
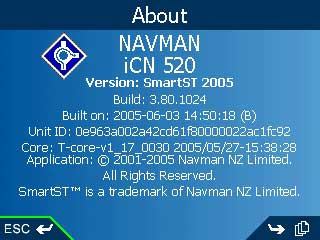
The lower right is the zoomed out map of the British Isles and the one underneath it shows the version I reviewed.
|
 |
| |
 |
| To the right are a couple of shots showing the London Congestion Charge zone. I haven’t checked the accuracy of the data but a brief inspection shows it to be shaded in the right places, of the areas that I’ve checked. |
 |
| |
 |


