 Words by Mike Alder Words by Mike Alder
Pictures by Teddy Bear (Jen)
Introduction
Being a new Scooter Rider and unfamiliar with the area PocketGPSWorld Forum Member Teddy_bear was looking for a solution and a TomTom Rider seemed to be ideal.
On of the requirements of any installation was that it was important that it could be achieved without cutting the bodywork or drilling any holes so as to preserve its resale value.
The normal method of attaching a Rider using the supplied installation kits is using the brake or clutch lever securing bolts. In this case this was not an option, the securing bolts were hidden under the handlebar fairing and so could not be accessed.
Installation
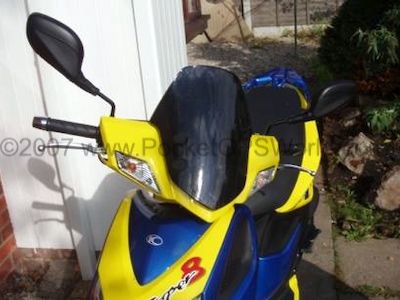
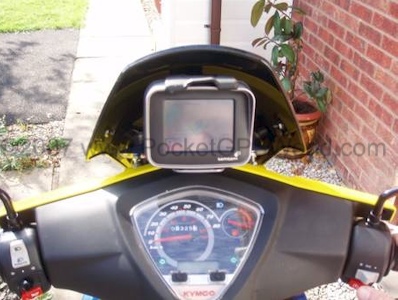
This was the bike before the Rider was fitted:
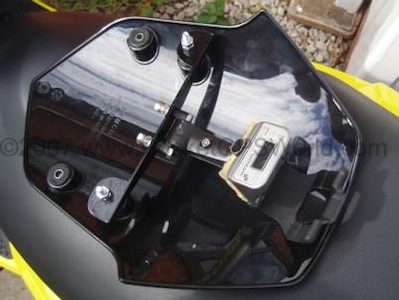
It was decided to use the existing windshield/fairing mounting points as securing points and to fabricate a custom bracket to which the Rider mount could be attached.
The bracket was fabricated from 25mm x 25mm aluminium angle section. Holes were drilled to match the windshield attachment points (152mm centres, 7mm diameter). A second set of holes were drilled to attach the supplied Rider cradle and mounting arm with it's associated swivel ball. Here is the bracket before we fitted it to the bike:
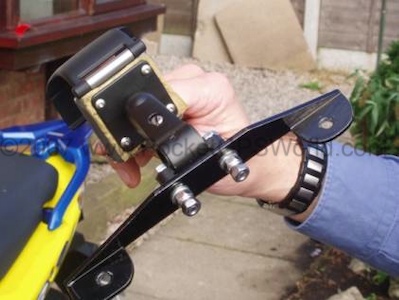
Extra length bolts with additional nuts and washers were employed to secure the whole assembly. These extended bolts not only secure the bracket but also act as stand off spacers to avoid the bracket fouling the fairing.
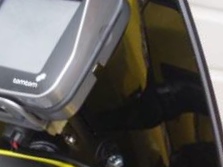
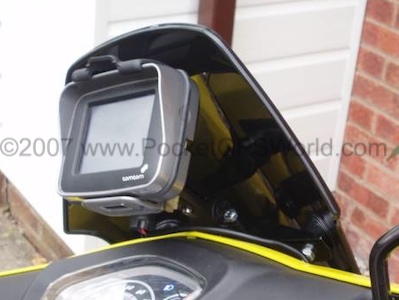
With everything tightened up the Rider mount was checked. With the Rider fitted to its mount it was easily visible when sat on the bike and most importantly did not block the view of any instruments or impede forward vision. An adequate gap between the windshield and the top of the Rider ensures easy fitment and removal of the device:
Attention now shifted to powering the device! Without a wiring diagram for the scooter this was not as easy as it could have been!
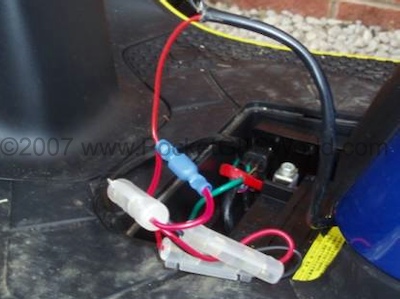
For safety and simplicity I decided to take the Rider supply cable through the fairing and down to the battery compartment. As with any installation like this it is important to route the cable safely and to secure the cable to prevent chafing etc. You need to ensure full lock to lock steering is not affected in anyway . Also ensure the cable is kept as far away as possible from the engine and specifically the exhaust.
Connect the Rider supply cable via a suitable fuse, never connect directly to the battery. There were a number of existing fuses in the battery bay so we utilised an existing fuse. If there are no spare fuses make sure you fit an inline fuse holder between the battery and the Rider supply cable.
Replace all the trim and associated removed screws etc. perform a final check of the steering, brakes and all lights/ electrical switches before taking the bike out on the road.
Conclusion
This mounting arrangement has provided a removable system that will leave no visible trace on the bike when finally taken off. It should be possible to fully remove this set-up in less than 30 minutes, day to day removal of the Rider takes seconds.
Time to fit (including making the bracket) was around 2.5 hours (excluding the time it took for the paint to dry!). There is a little vibration apparent when stationary with the engine running but once on the move everything is fine.
|


